
How to Set Up a CRM Account
CRM SET UP GUIDE
Helpful Video Guide
For a visual and detailed walkthrough of the CRM setup process, please watch our helpful setup video. This video will guide you through each step, ensuring you have a clear understanding of how to effectively use and customize the CRM to fit your needs.

This video is hosted on YouTube and requires cookies to view.
YouTube Privacy PolicyThis guide will help you quickly set up your CRM system and integrate it with StoriiCare. Follow these steps to ensure a smooth setup process and to make full use of the CRM's capabilities.
Key Features
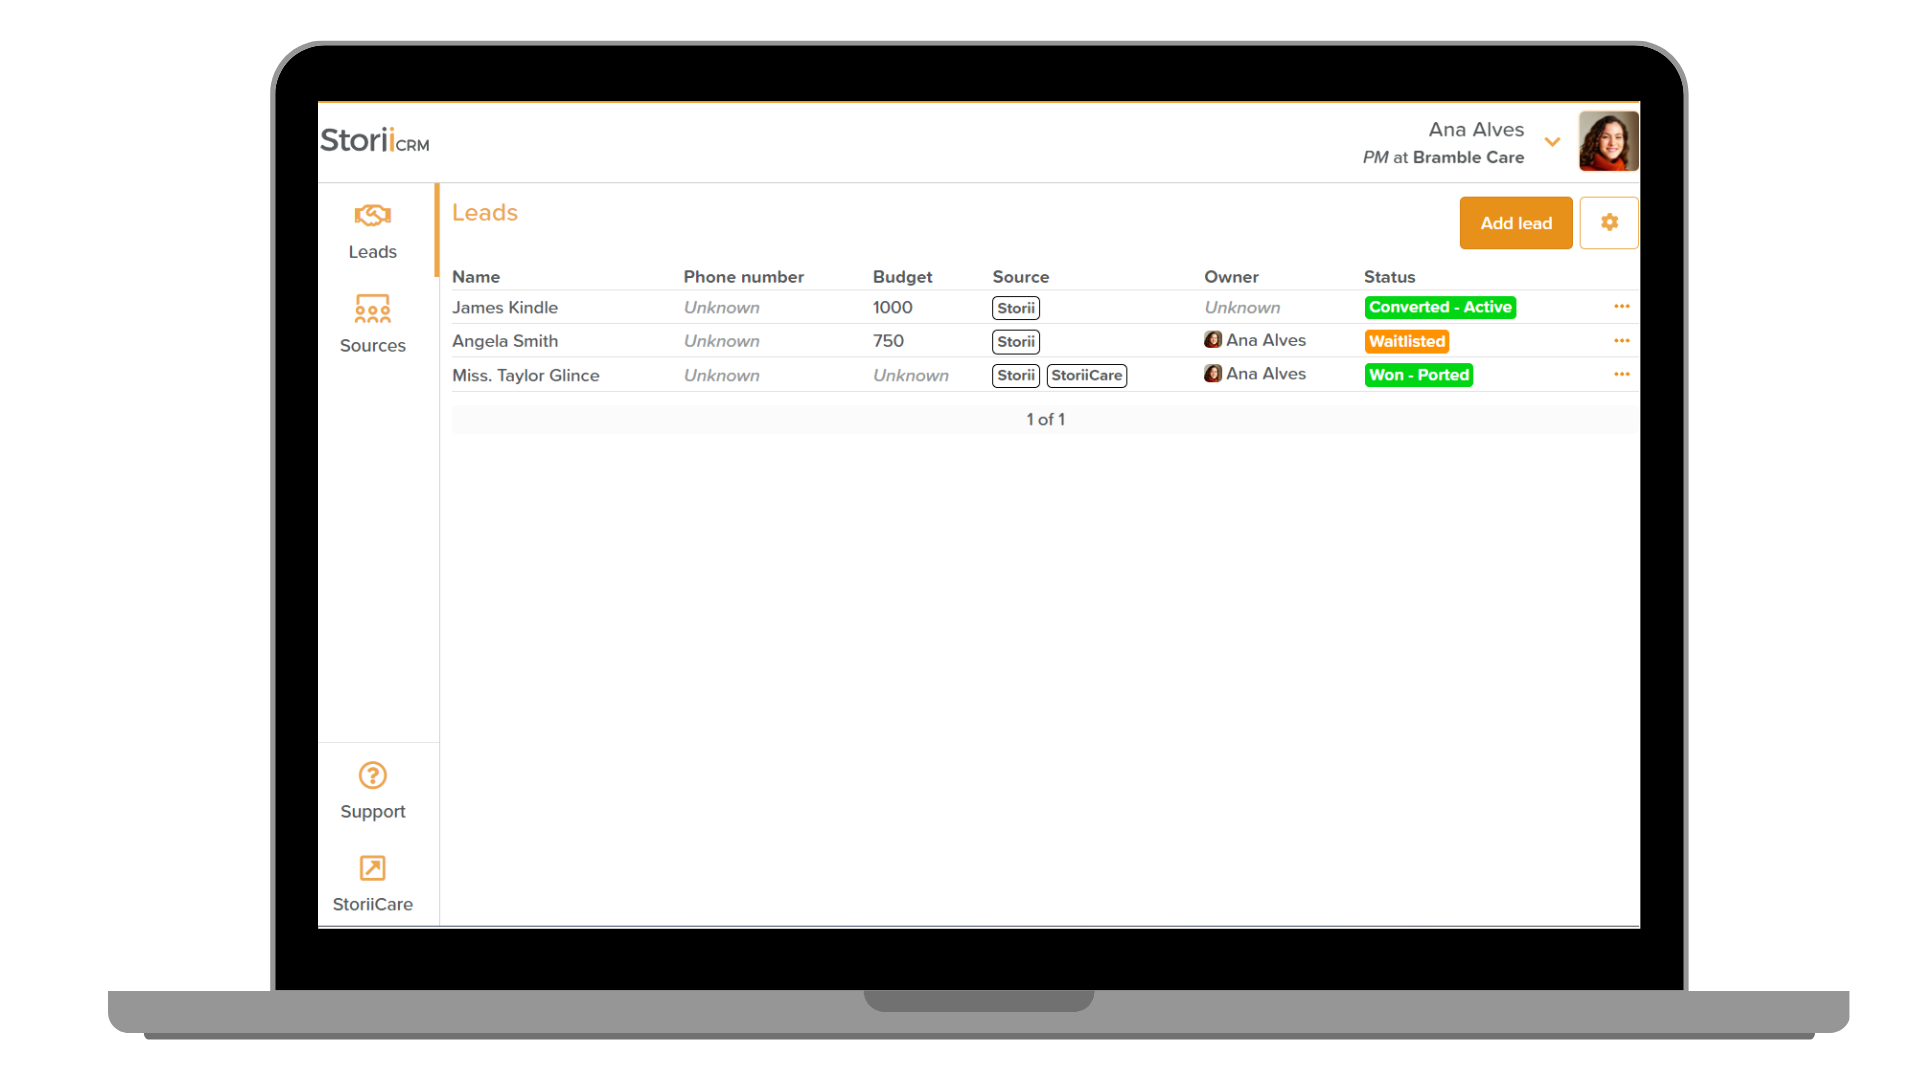
- Lead Management: Add leads, append notes, and view modification history.
- StoriiCare Integration: Directly port leads and their notes to StoriiCare.
- Account Connections: Link multiple StoriiCare business accounts to a single CRM.
- Customization: Customize lead and source fields to add custom data, and customize the dashboard table view.
- Team Collaboration: Invite an unlimited number of staff members.
Step-by-Step Setup
Log in to the CRM
Access the Customer Relationship Management tool using the credentials provided by the StoriiCare Support Team. The login credentials are an email address and a password.
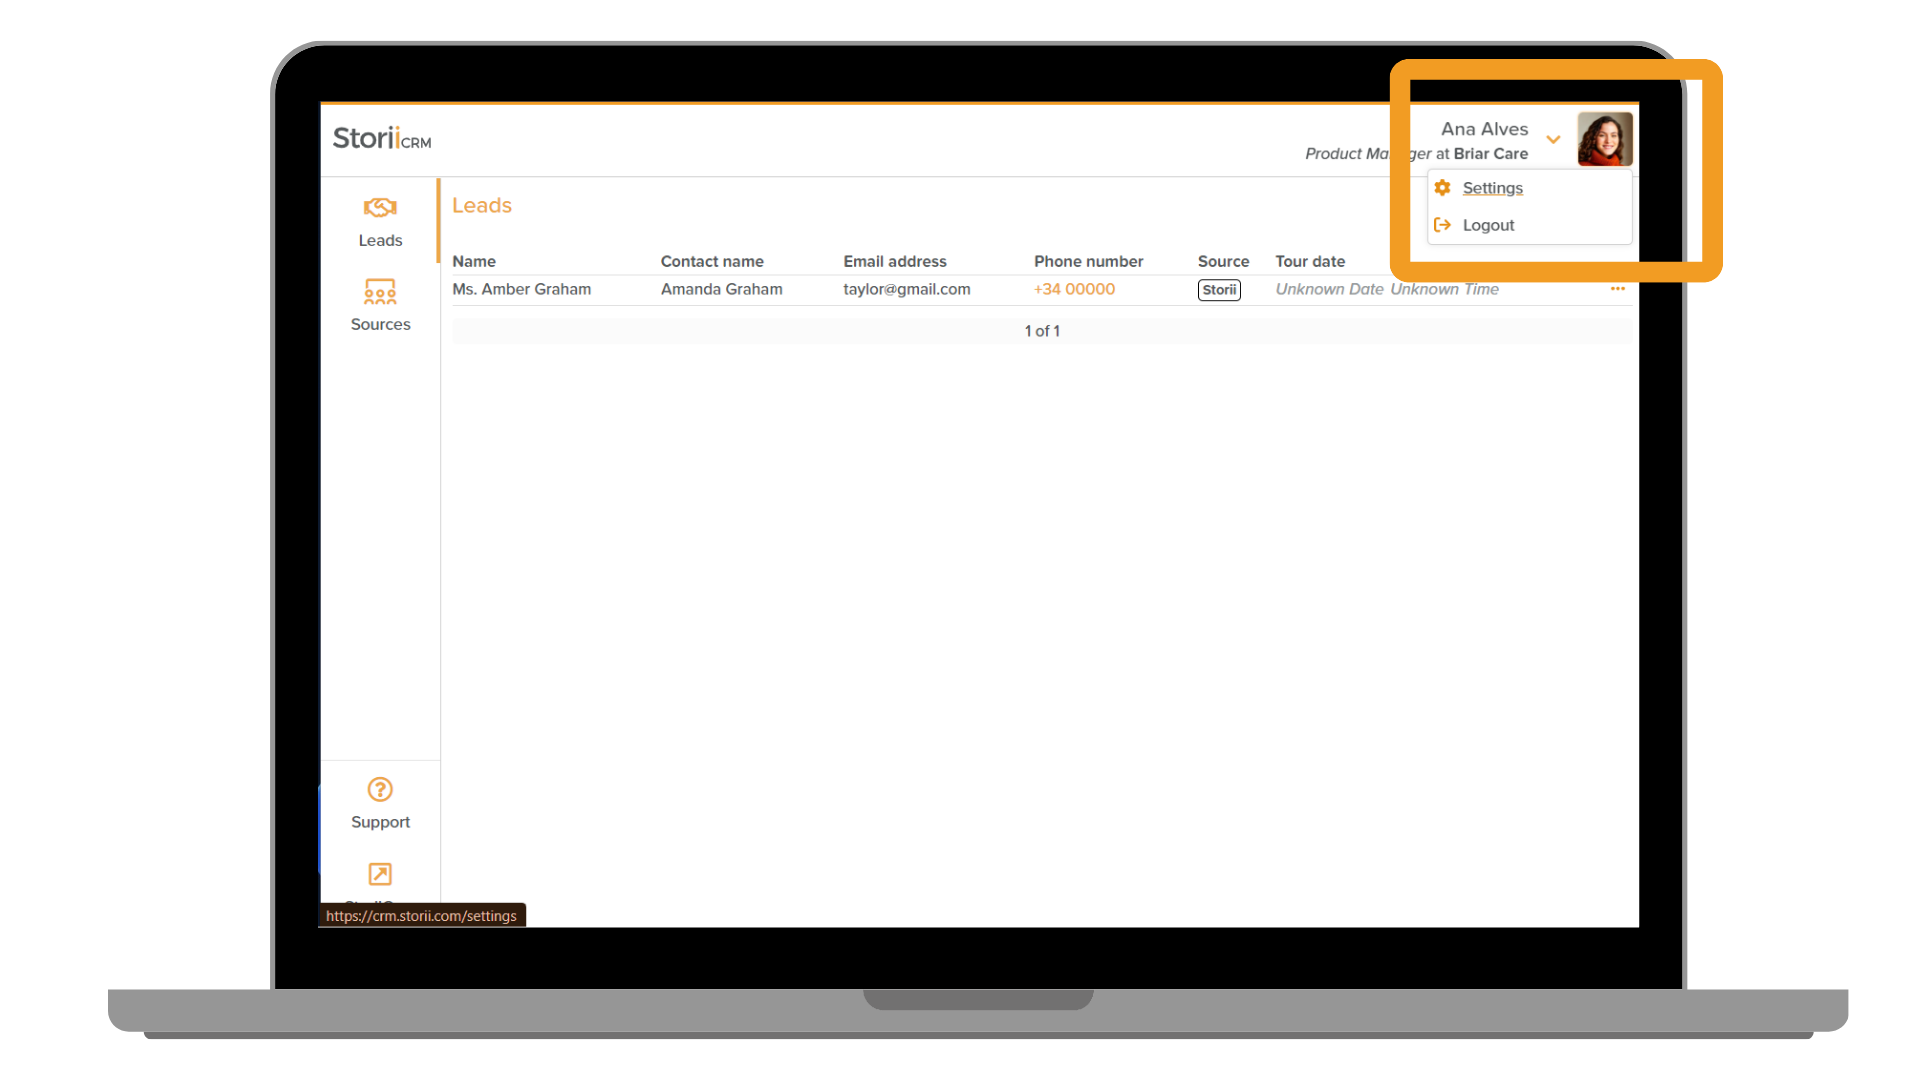
Access Settings
Click on the profile image at the top right side of the platform and select "settings" from the dropdown menu.
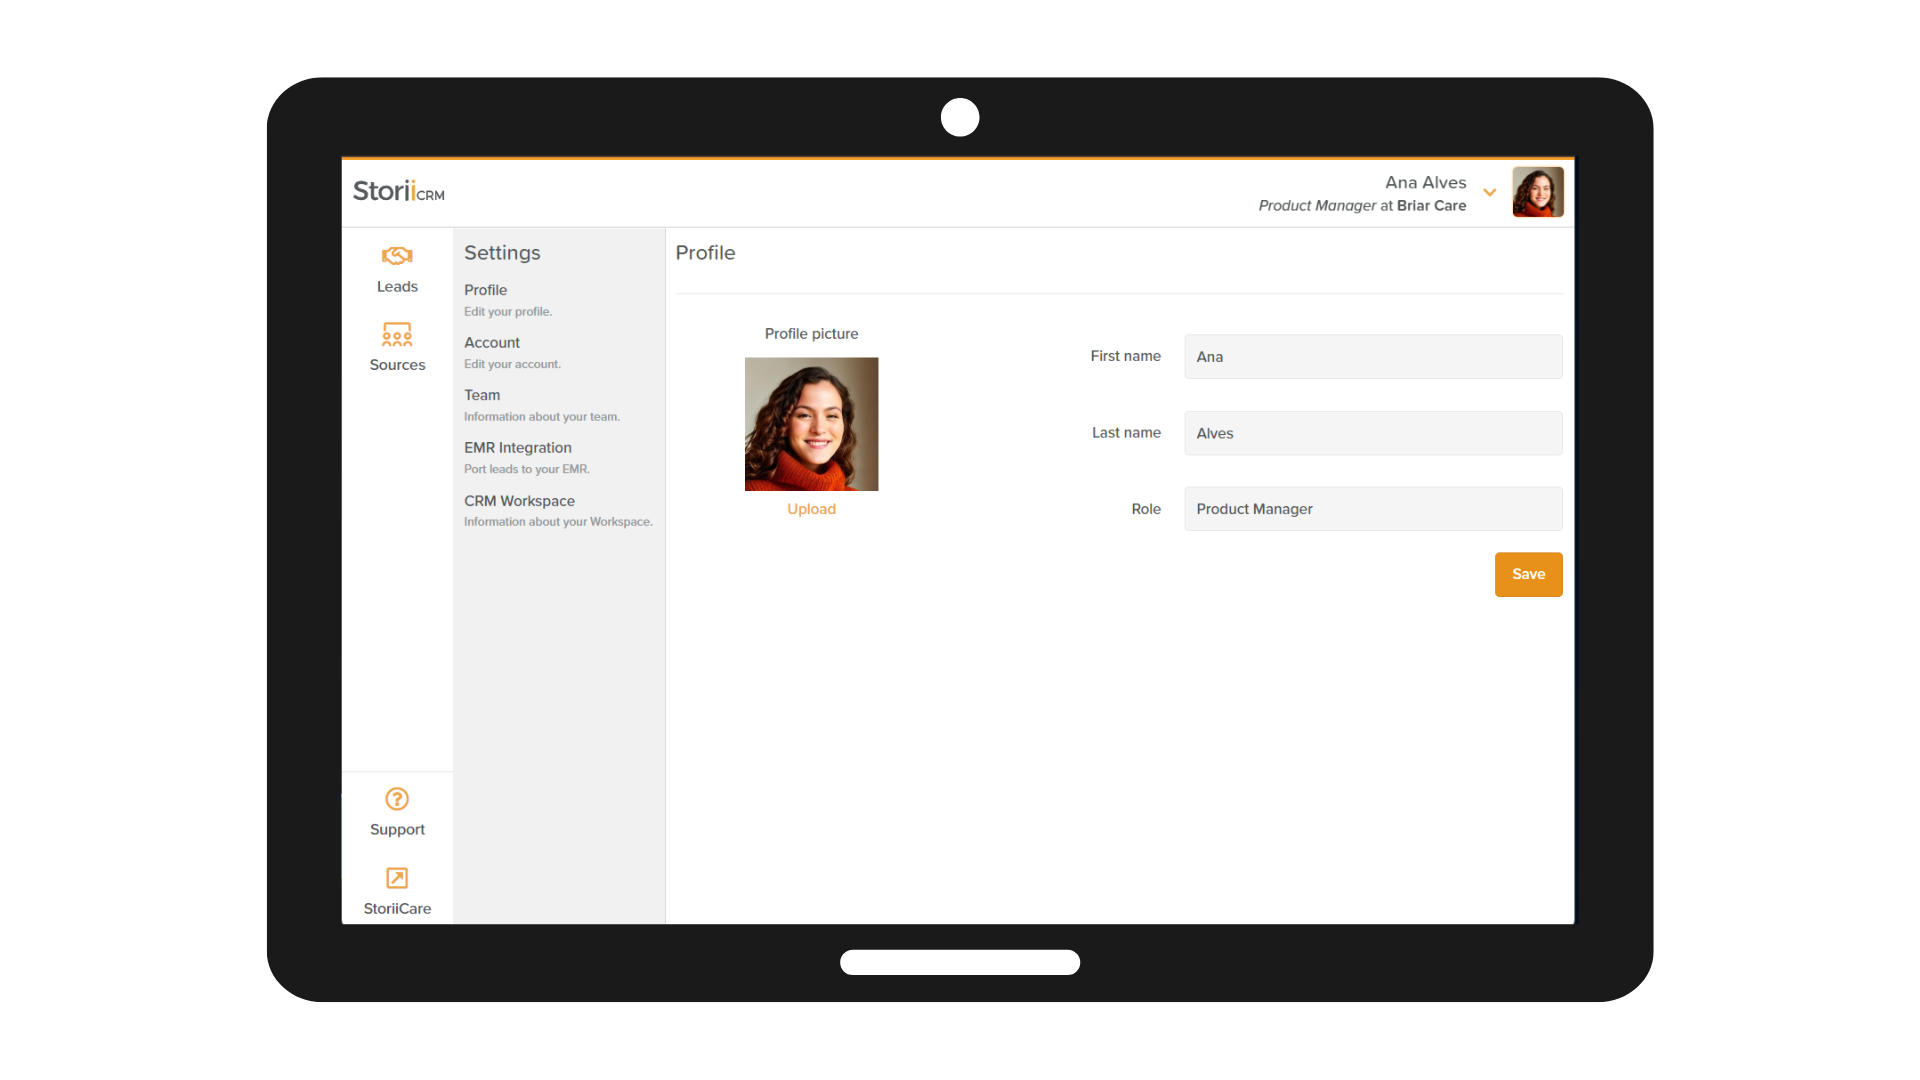
Configure Profile and Account
Adjust settings on the Profile and Account tab as you see fit. Add business and personal details to the account and a profile picture.
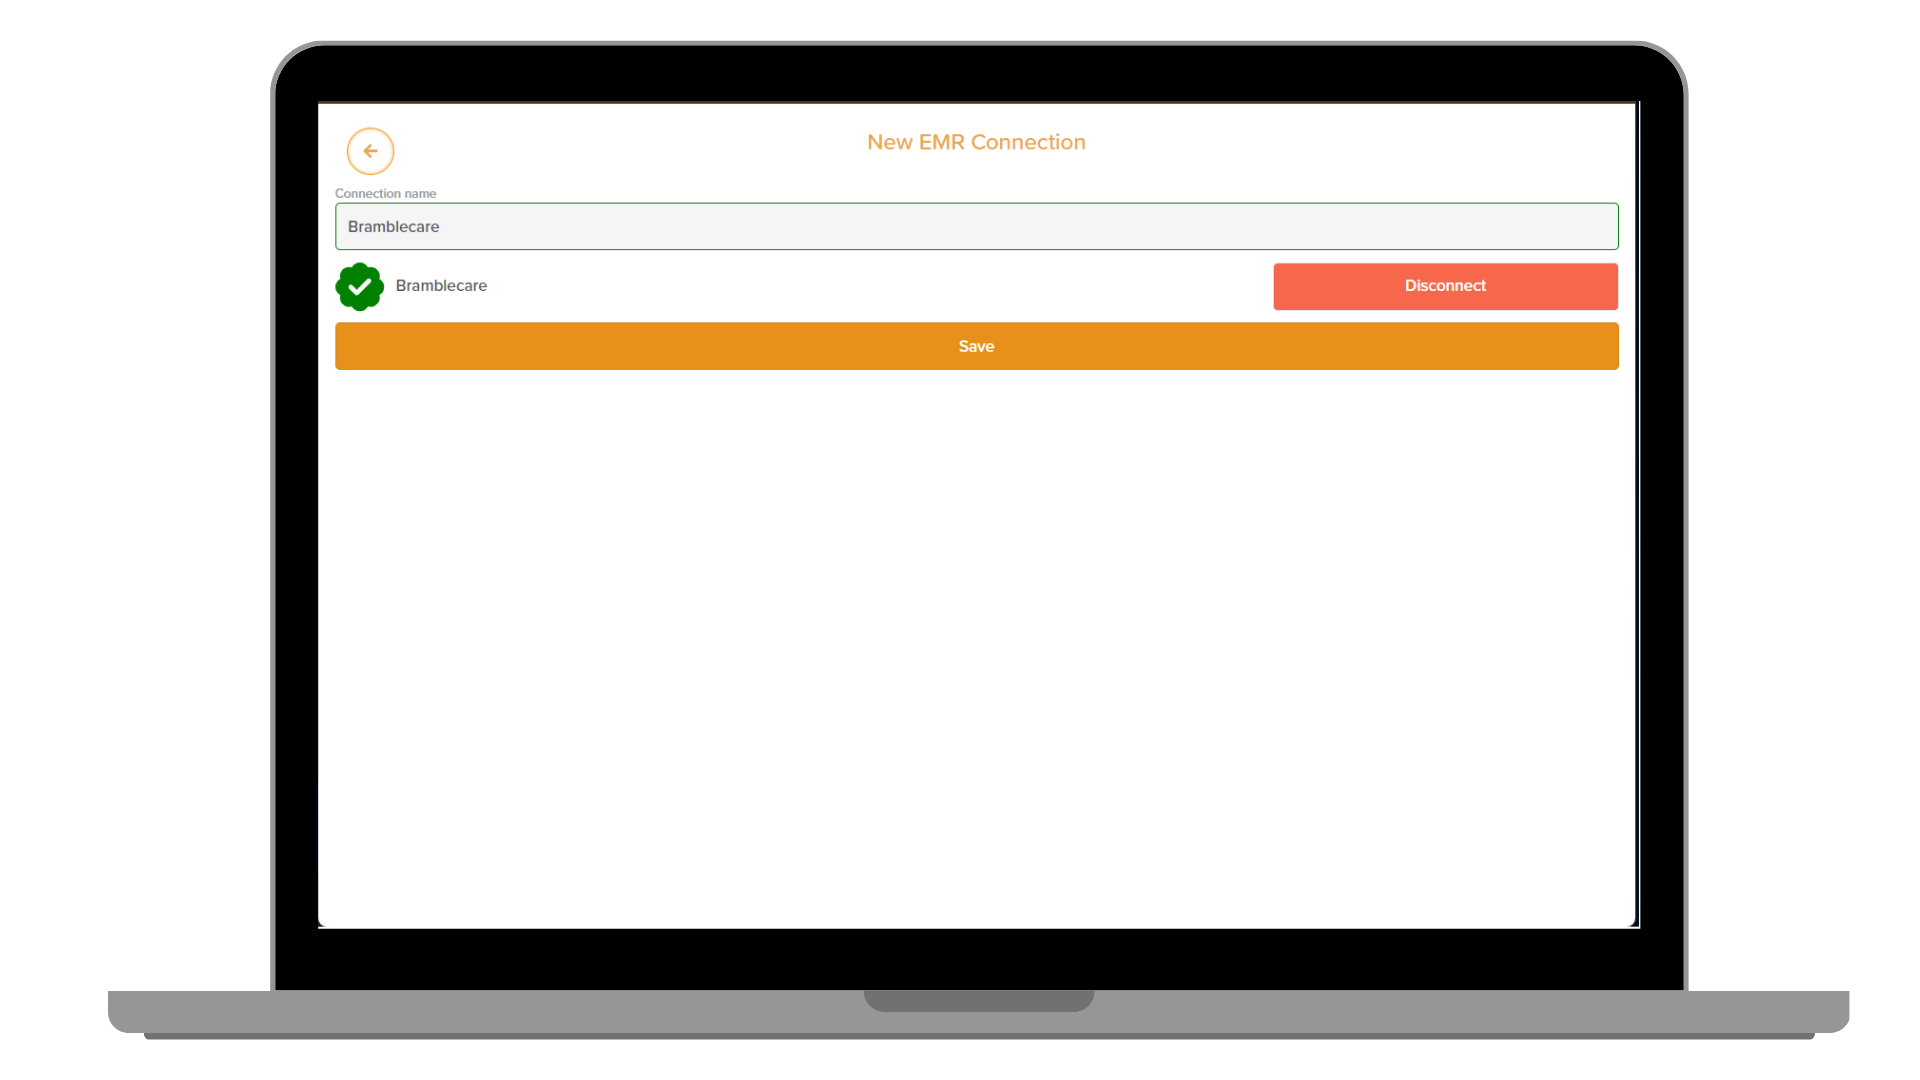
EMR Integration
Under the EMR Integration tab click on "add new" in order to link the CRM to a StoriiCare account for seamless integration. To complete the integration process, you will need to enter the Master Credentials of the Business on the “StoriiCare login username/email” and “StoriiCare password” fields. If you have any questions whilst enabling the connection of the CRM to your StoriiCare account, please contact our Support Team at support@storii.com.
Besides that, you can also provide a custom name for this integration using the “Connection name” field. We recommend adding the name of the Business to this field.
Once you have, entered the Master Credentials, you will click on “Validate” to verify the Credentials and complete the connection. If the connection is successful, you will see a confirmation green check appear and you will now be able to transfer leads to StoriiCare directly.
Add staff members to the CRM account
Under the StoriiCRM settings page, click on the “Team” tab to invite team members, manage users and visualize “pending invitations”. Use the email addresses to invite staff members to the CRM account. New users will receive an invitation via email and then they will be able to set an individual password and login to the StoriiCRM.
Lead Settings
Go to the "Settings" icon under the Leads tab to manage lead configurations. Add fields, rearrange the fields' order, change the main field displayed first on the CRM table and the lead porting fields. Also, enable the fields you want to show in the CRM table view by toggling "Show in table."
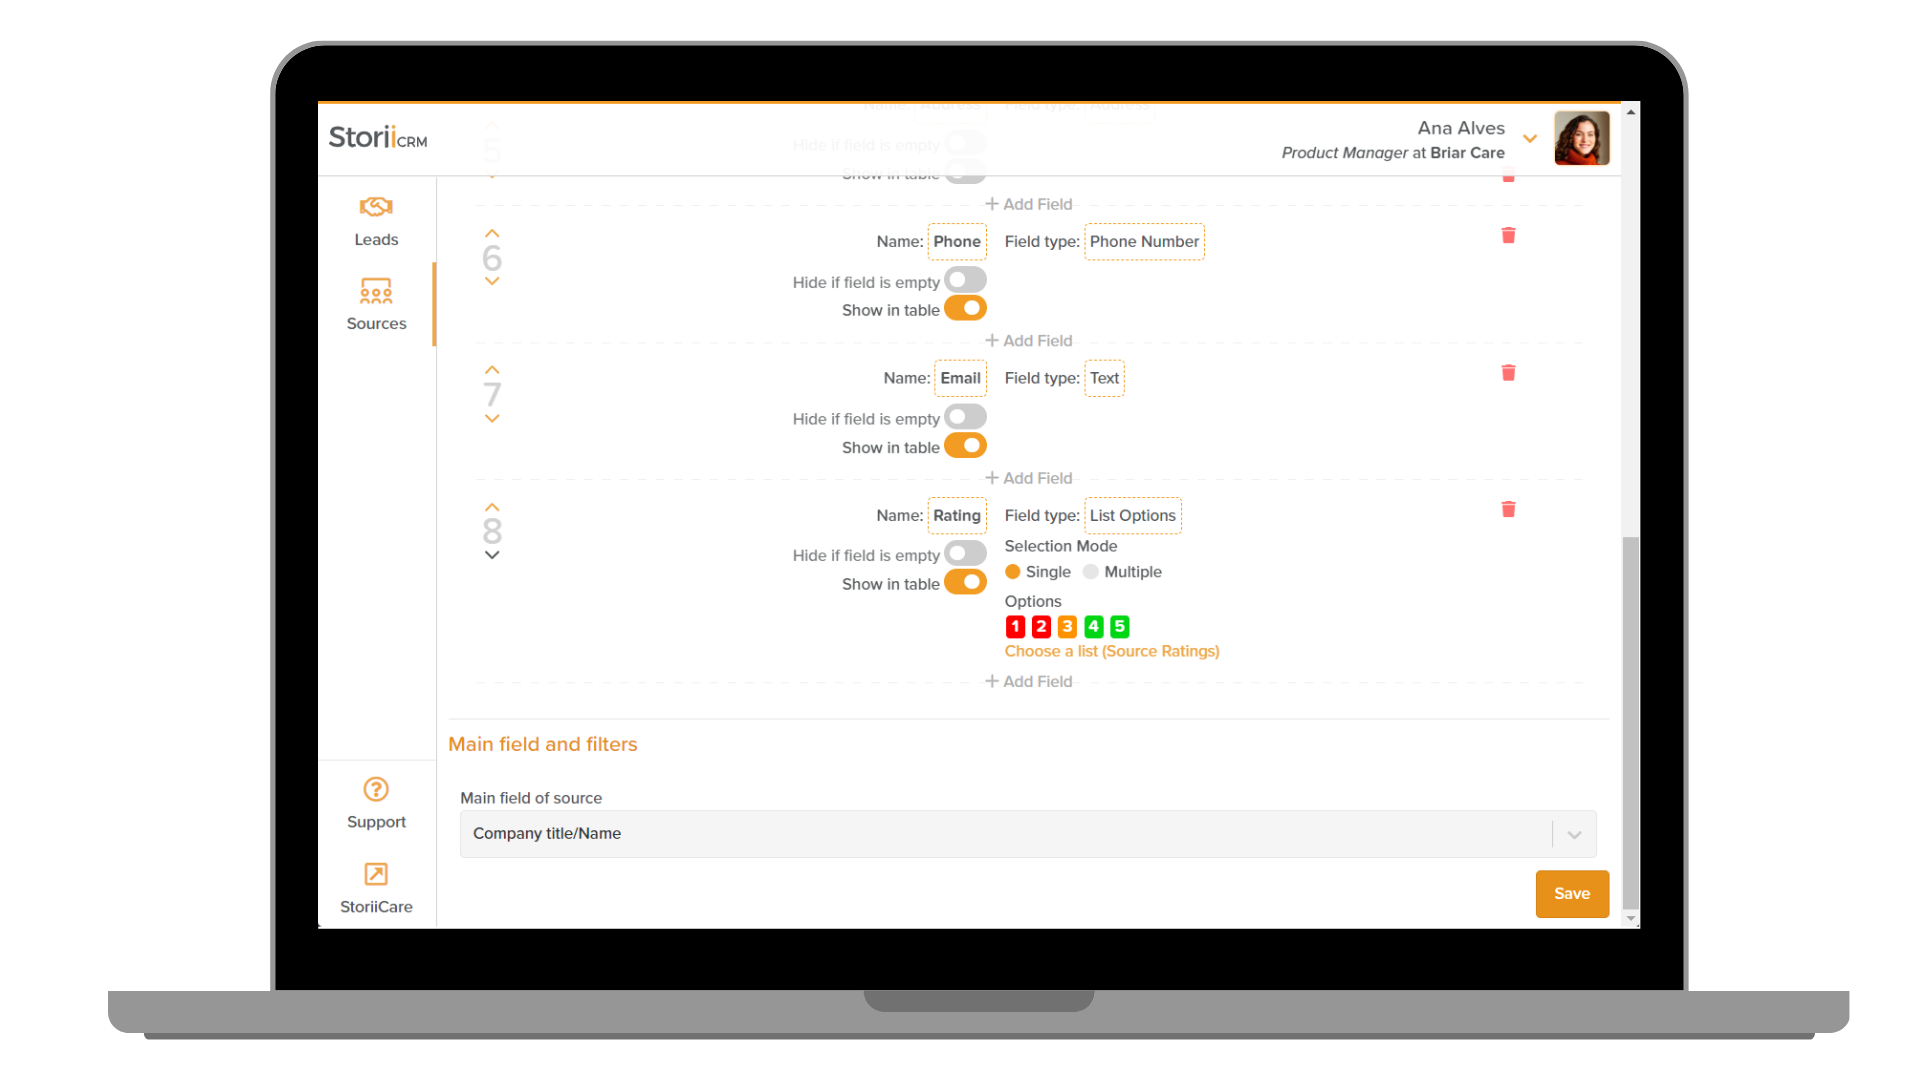
Source Settings
Under the sources tab, click the settings cog to configure sources. The configuration will allow you to add new fields, reorder them, and set the main field that will be used to indicate the source “name”. This step is very important, do not forget to scroll down on the sources setting page and set the main field that will be used to name the source.
Test the Setup
Add a test lead with fictitious information to ensure all settings are set as expected.
This guide should help you effectively set up and start using your CRM. Should you encounter any issues or have questions, please contact our support team for assistance.