
How to Customize and Send Email Templates
On StoriiCare there is a toolset for personalizing your email templates to send invoices, enhancing the overall communication experience as branded emails allow for personalized and professional communication with your clients. Follow this step-by-step guide to customize your email templates efficiently:
Initial Steps
Start by accessing the email settings within your StoriiCare account to begin customizing your email templates.
1. Access Billing: Begin by clicking on "Billing".
2. Navigate to settings: Click on the "Settings" tab to find various configuration options.
3. Find email settings: Scroll down to “Email Settings” to locate the email customization options.
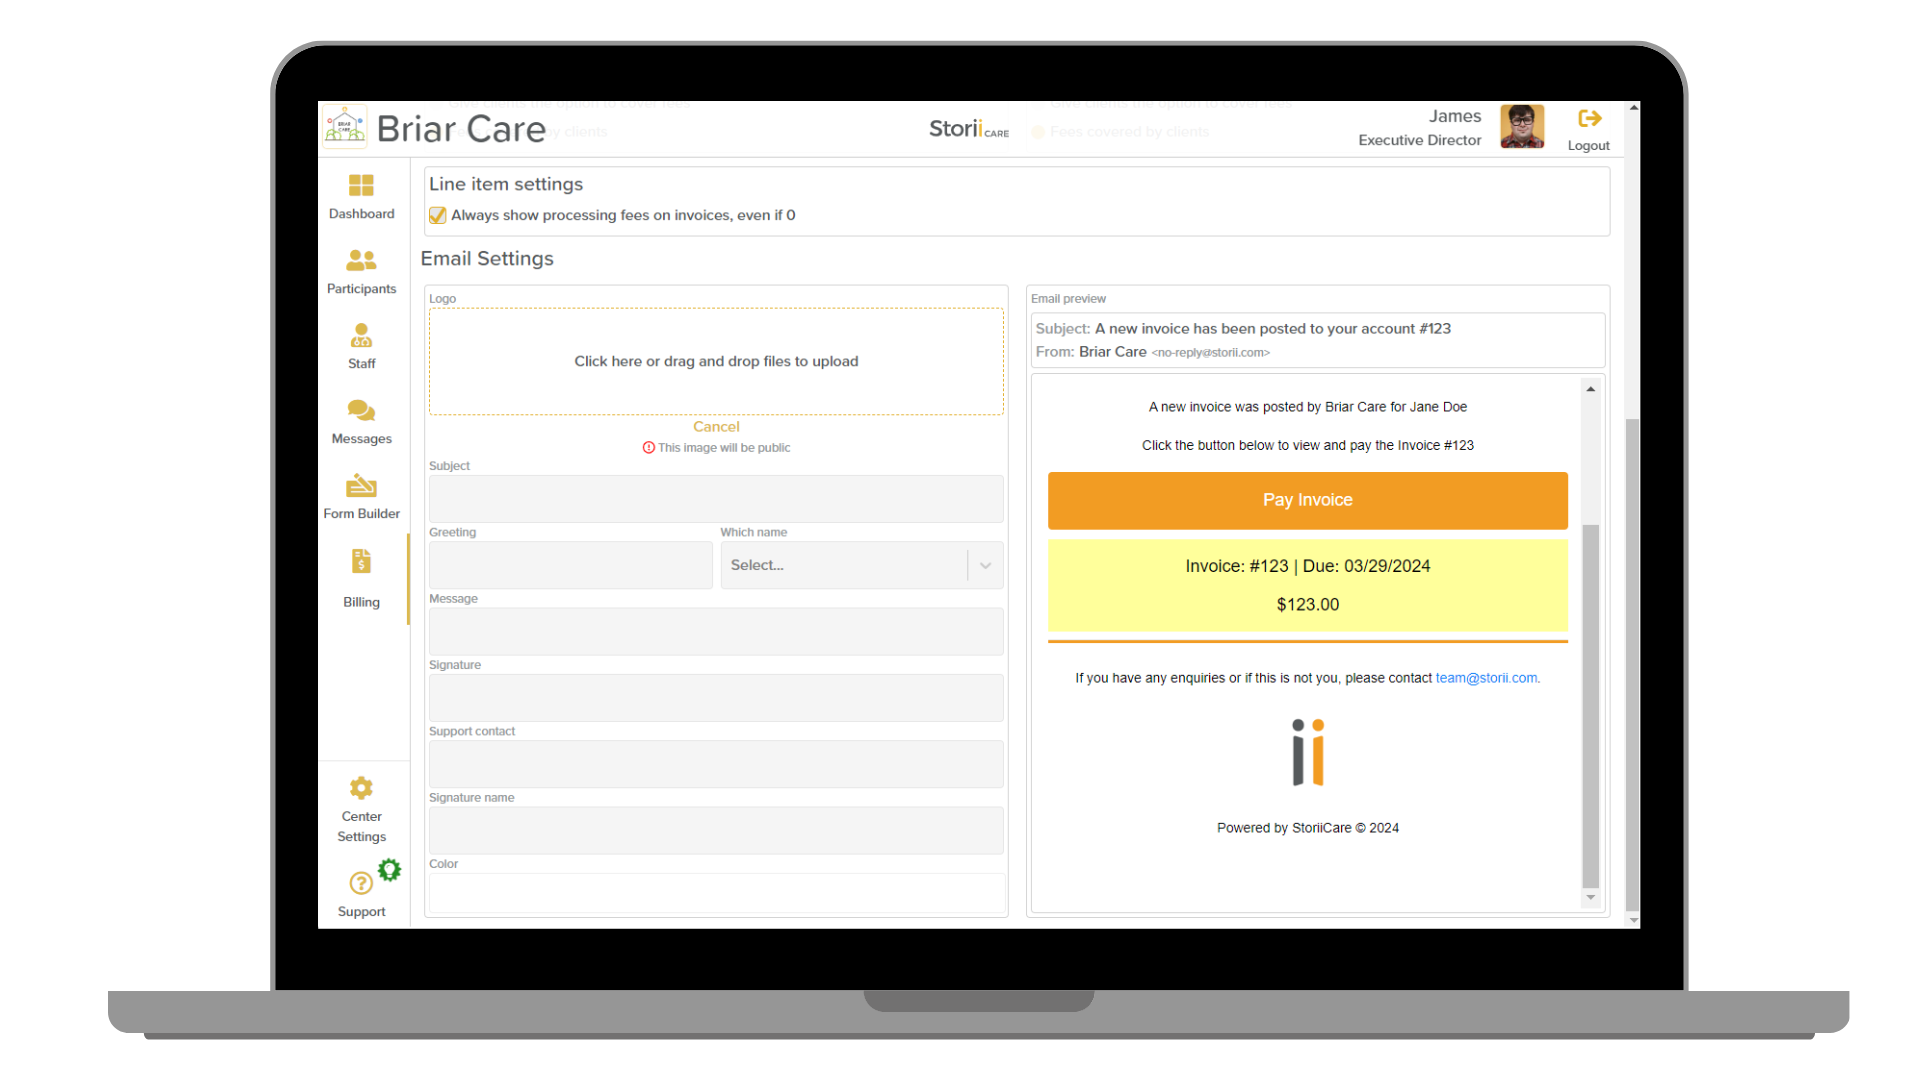
Setting Up and Editing Templates
Create your custom templates and make necessary edits to ensure your emails convey the intended message and follow the most up-to-date branding guidelines.
4. Upload logo: Click on "Click here or drag and drop files to upload" to add a new logo to the email template.
5. Confirm upload: Click on "Upload" to finalize the upload of your logo file.
6. Edit template text: Afterwards, enter text within the fields below to customize the email body and information displayed. As you make changes to the template, you shall observe the changes being reflected on the right side of the “Email preview” section.
7. Add your brand color: Scroll down to the “Color” field and add your brand color to be applied to the email template.
8. Save the changes: On the bottom right side, you shall find the “Save” option. Ensure that the changes implemented are saved by hitting the save button.
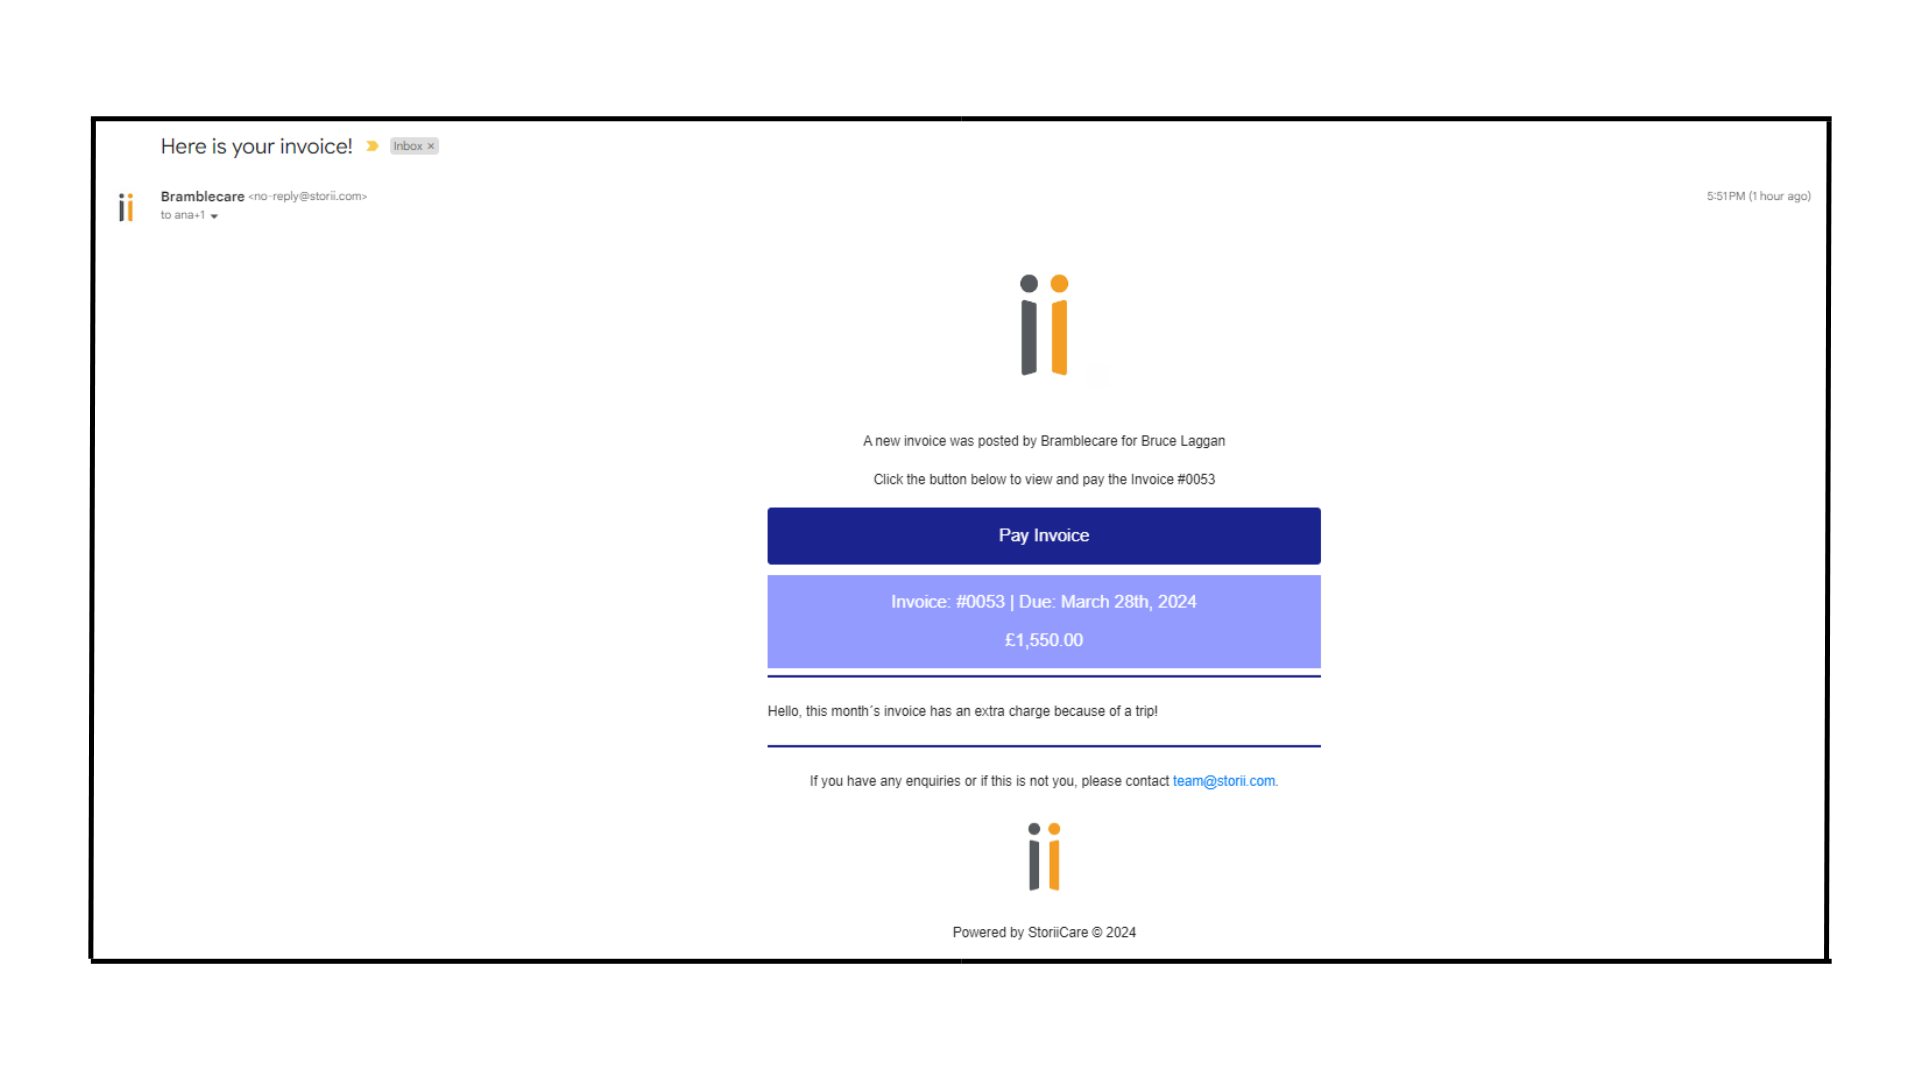
Sending Customized Emails
With your email template customized, you're ready to send out personalized emails to your clients or users.
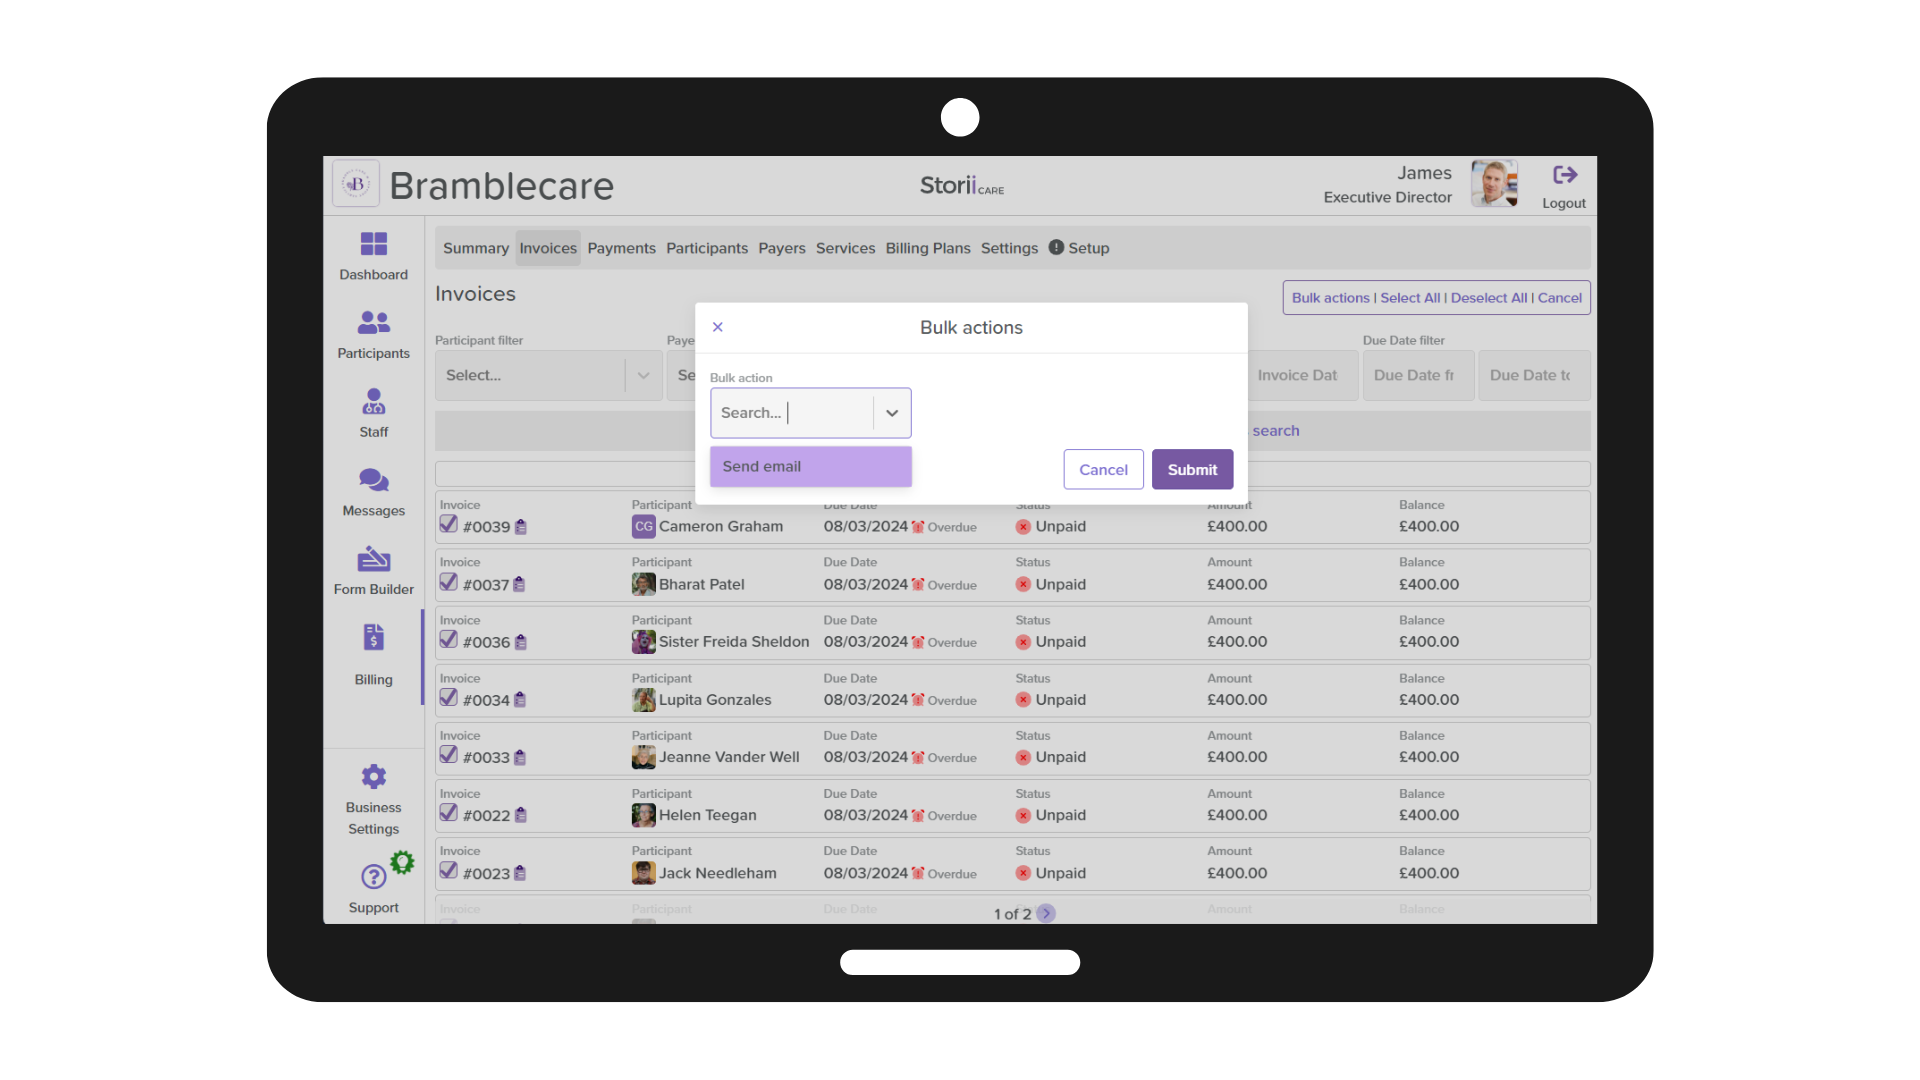
9. Send emails in bulk using the new template: You may now send emails with the template designed in bulk on the Invoice tab by multi-selecting the invoices, and clicking on “Bulk actions” followed by “Send Email”.
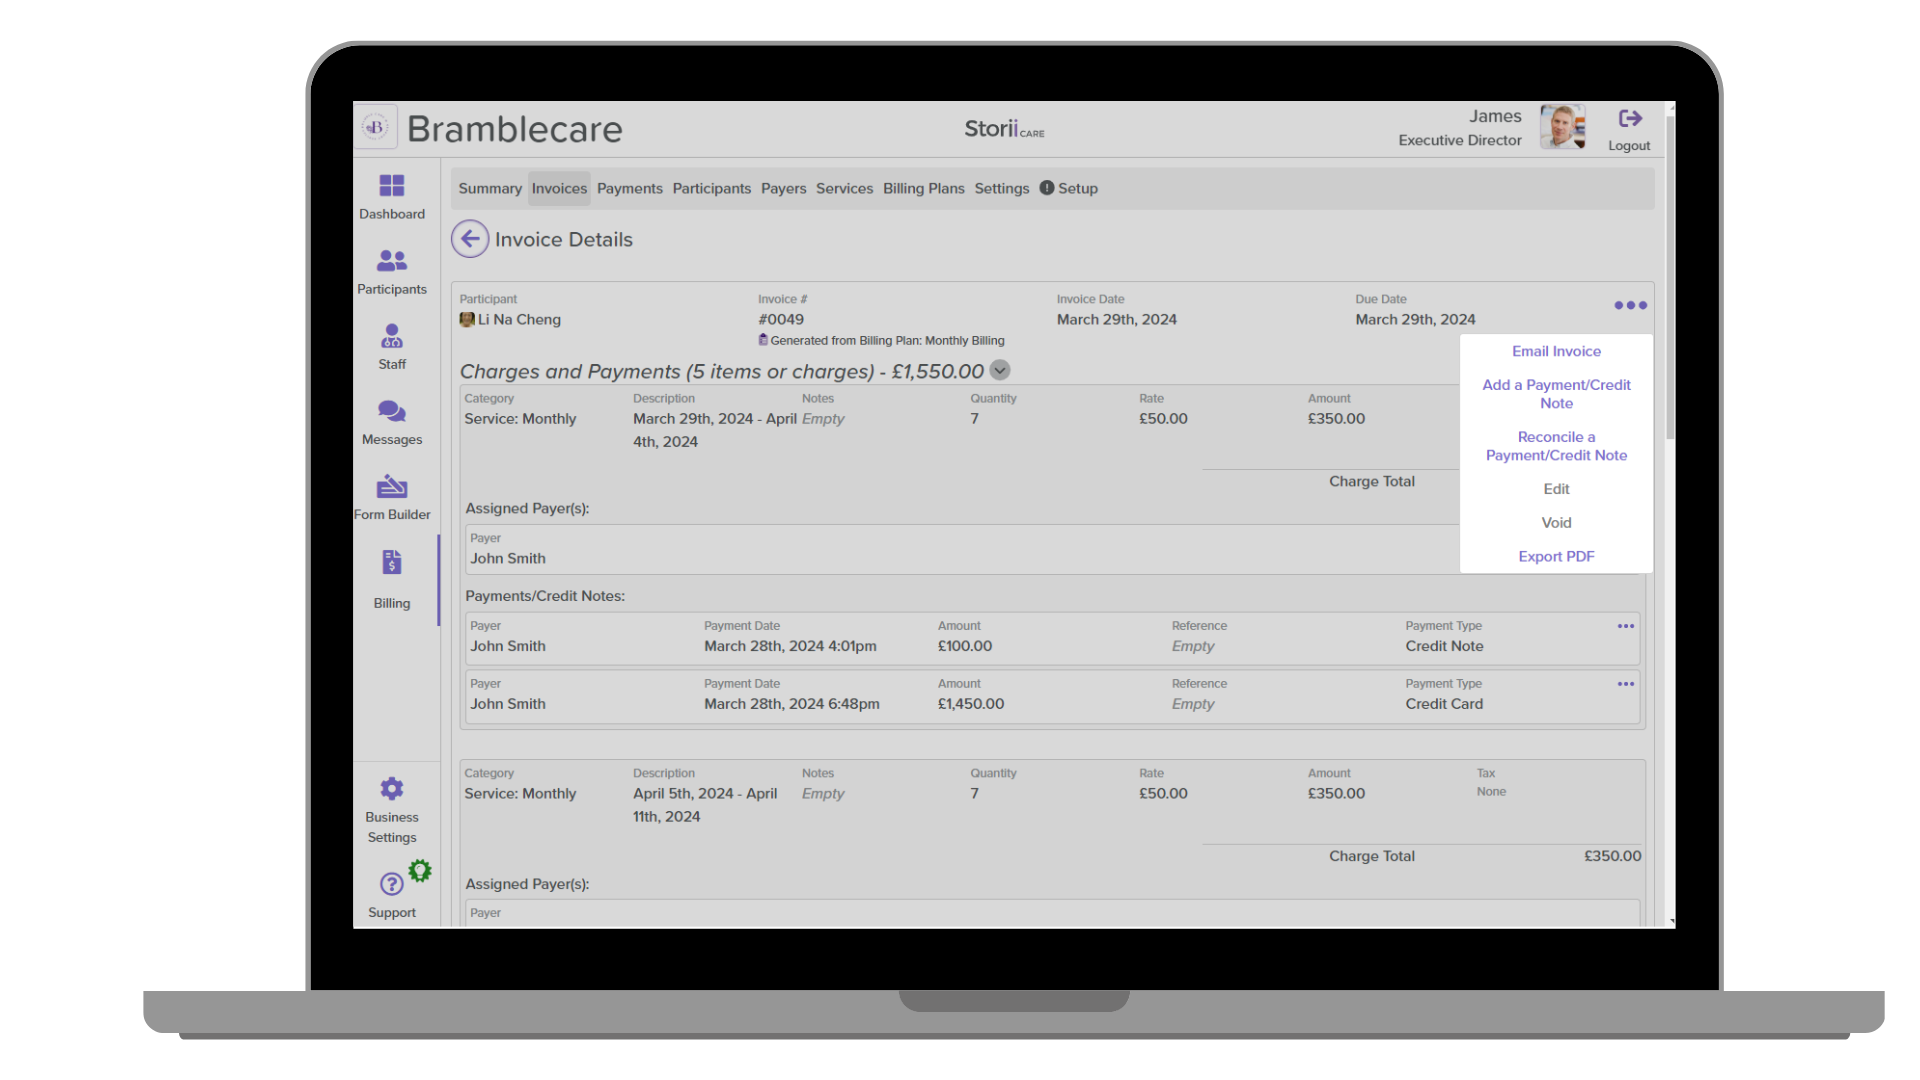
Or send individual emails: You may also use the template to send single invoices, by clicking on the invoice, clicking on the three dots on the right side of the screen and then selecting “Email Invoice”.
10. Customize outgoing email: Once that's done, you can send the email using the template created or click on "Customize outgoing email" to modify the template for this specific outgoing email (any changes made will not impact the template).
11. Send email: To end off, click on "Send" to send your customized email.
Reviewing Email Logs
After sending the emails, it is also possible to visualize the log on the bottom of the invoice that was shared with the Payer´s email address.

Following these steps will guide you through customizing your email templates on StoriiCare, ensuring your communications are both personalized and professional. If any questions arise, please contact StoriiCare support and book a support session to set up your email template for emailing invoices.