A Guide to Using Tasks
How to Create a Custom Task
Open Tasks from the Dashboard
Click on the Settings wheel icon at the top of the page
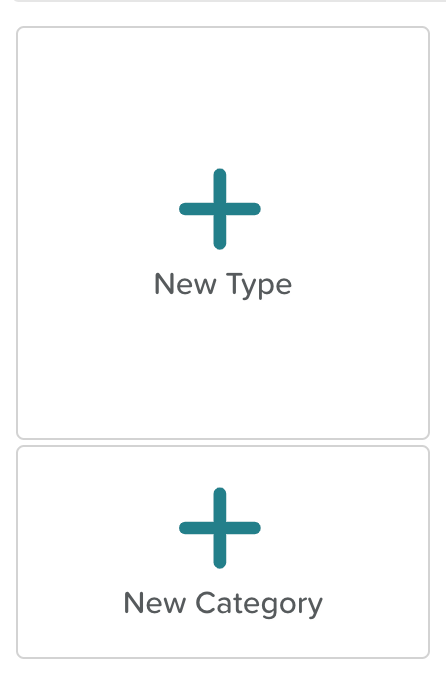
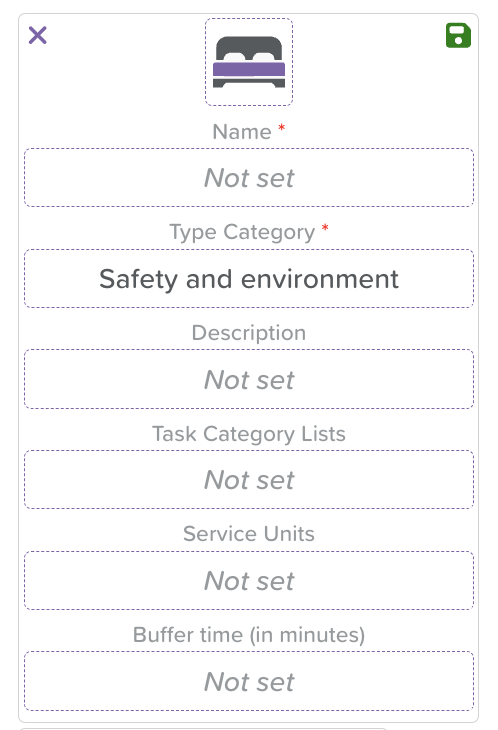
Click on the 'New Type' and 'New Category' boxes to input your information
4. Click the green check mark icon to save your changes once you have filled up the required fields. You can also configure the categorisation functionality, navigate to the Task Configuration view, and setup the Task Categorisation List. Once configured, tasks will display a dropdown menu with options to categorise them as mark them as to-do, complete, or incomplete, depending on the selected Task Type. This feature improves task management by allowing you to easily categorise and track the progress of each task, ensuring a more organised workflow.
How to Schedule a Task
Open Tasks from the Dashboard
Click where it says 'Create a new task'
Select a Task (this will open up the database of tasks - type in a task name to search for it)
Add a description (optional)
Select a start date for the task
Select a time for the task to be completed
You have the option to add specific "TO" and "FROM" times
You have the option to select "ALL DAY" if the task is not time-bound
Select how often you want this task to recur from the drop-down menu (or leave it, if this is a one-off task)
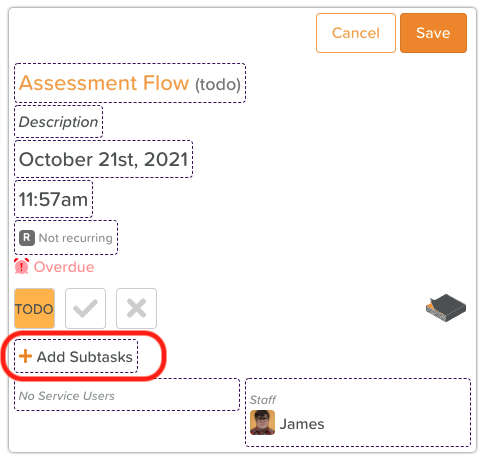
Add subtasks (optional)
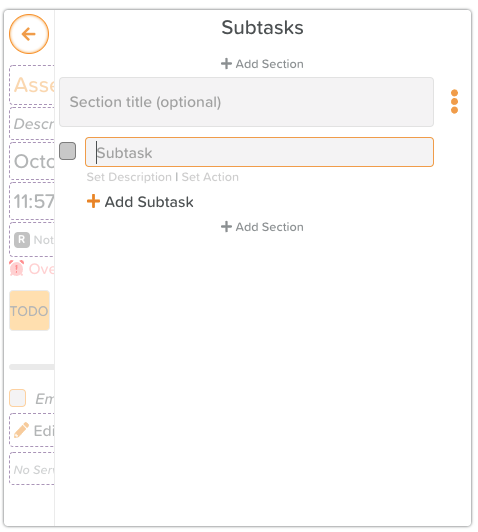
You can 'Set Description' by clicking on the text below the field
You have the option to 'Set an Action' by clicking the text below the field
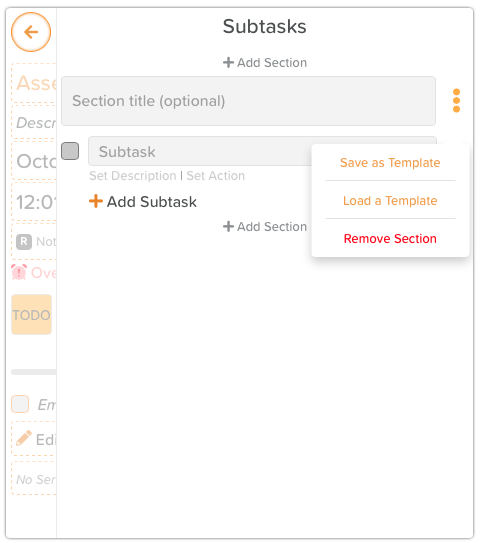
By clicking on the three dots next to the Subtask name you can 'Save a template' to use this subtask list again OR you can 'Load a template' if you're wanting to input a list that has been previously saved
9. Next, click where it says No Service Users
10. Type or scroll to find and select the service users you're scheduling the task for (it will create a separate task for each service user)
11. Click where it says No Staff Members
12. Type or scroll to find and select which staff are responsible for completing this task
13. Hit the Save button in the top, right-hand corner
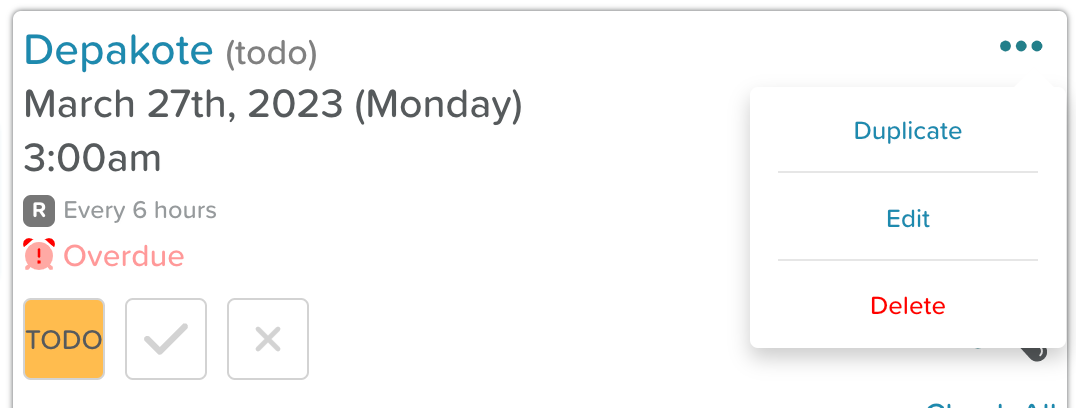
How to Edit a Task / How to Delete a Task
Find the task you need to make changes to and click on it to open the expanded view
Click on the three dots in the top, right-hand corner
From here, you can edit or delete the task
IF EDITING: Make your changes and then save.
If the task you're making changes to/deleting is recurring, upon saving you will have the option to apply your changes to all recurring tasks or just one.
Don't see the three dots? In this case, you probably don't have permission to make changes to a task. Please see an account manager or admin to check this.
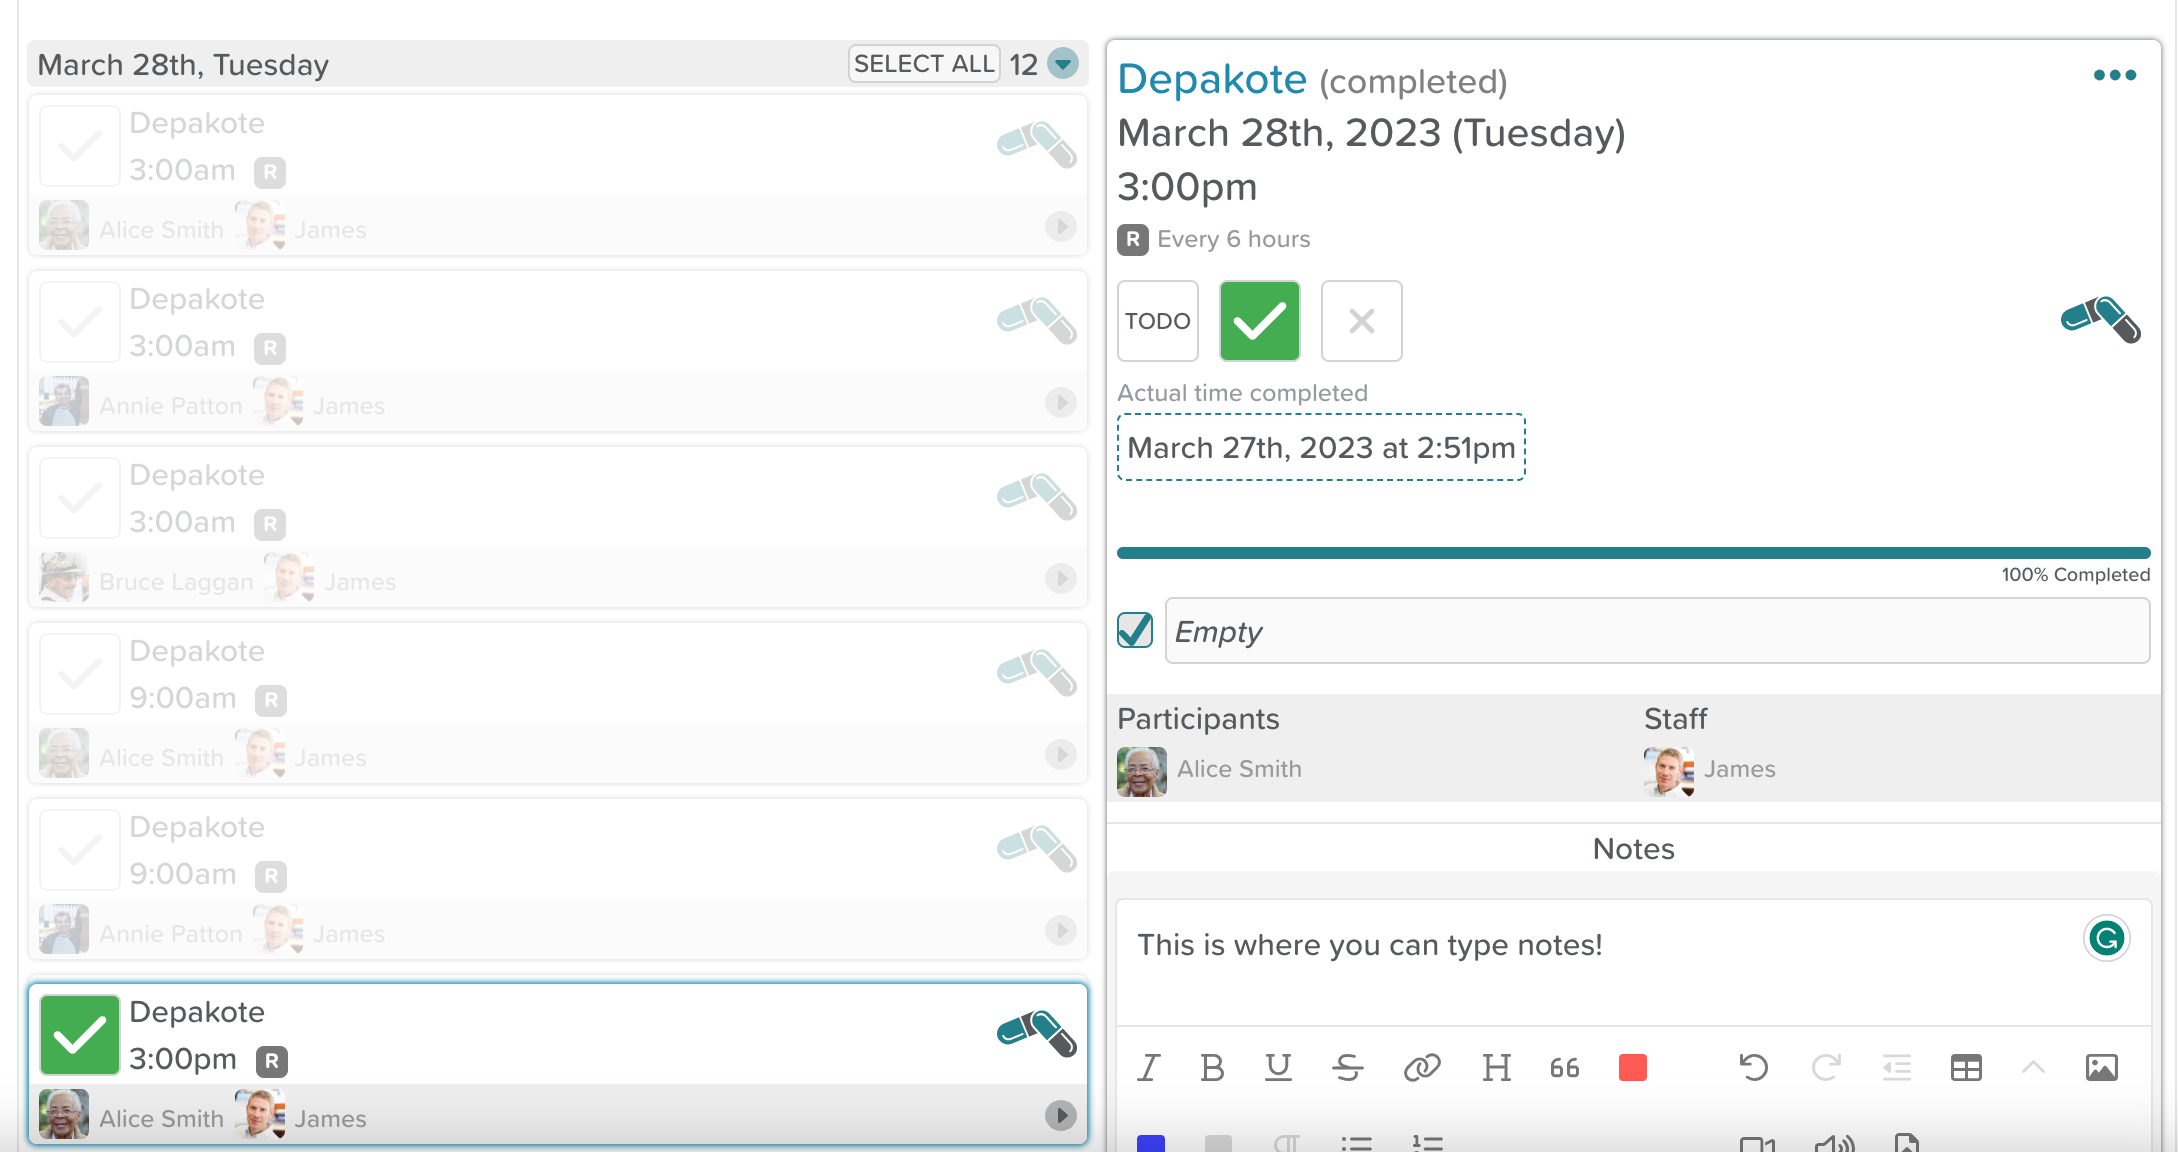
How to Complete a Task
To mark a task as complete, click the checkmark icon. This will turn green.
If you need to leave any additional notes, upload files, insert links, etc. or complete subtasks, you can click on the task box and an expanded view will open.
If you need to change the time completed, you will see an 'Actual time completed' section you can edit.
How to View Tasks for a Specific Staff or Service User
Open Tasks from the Dashboard
Use the three filters at the top of the screen to narrow down your search
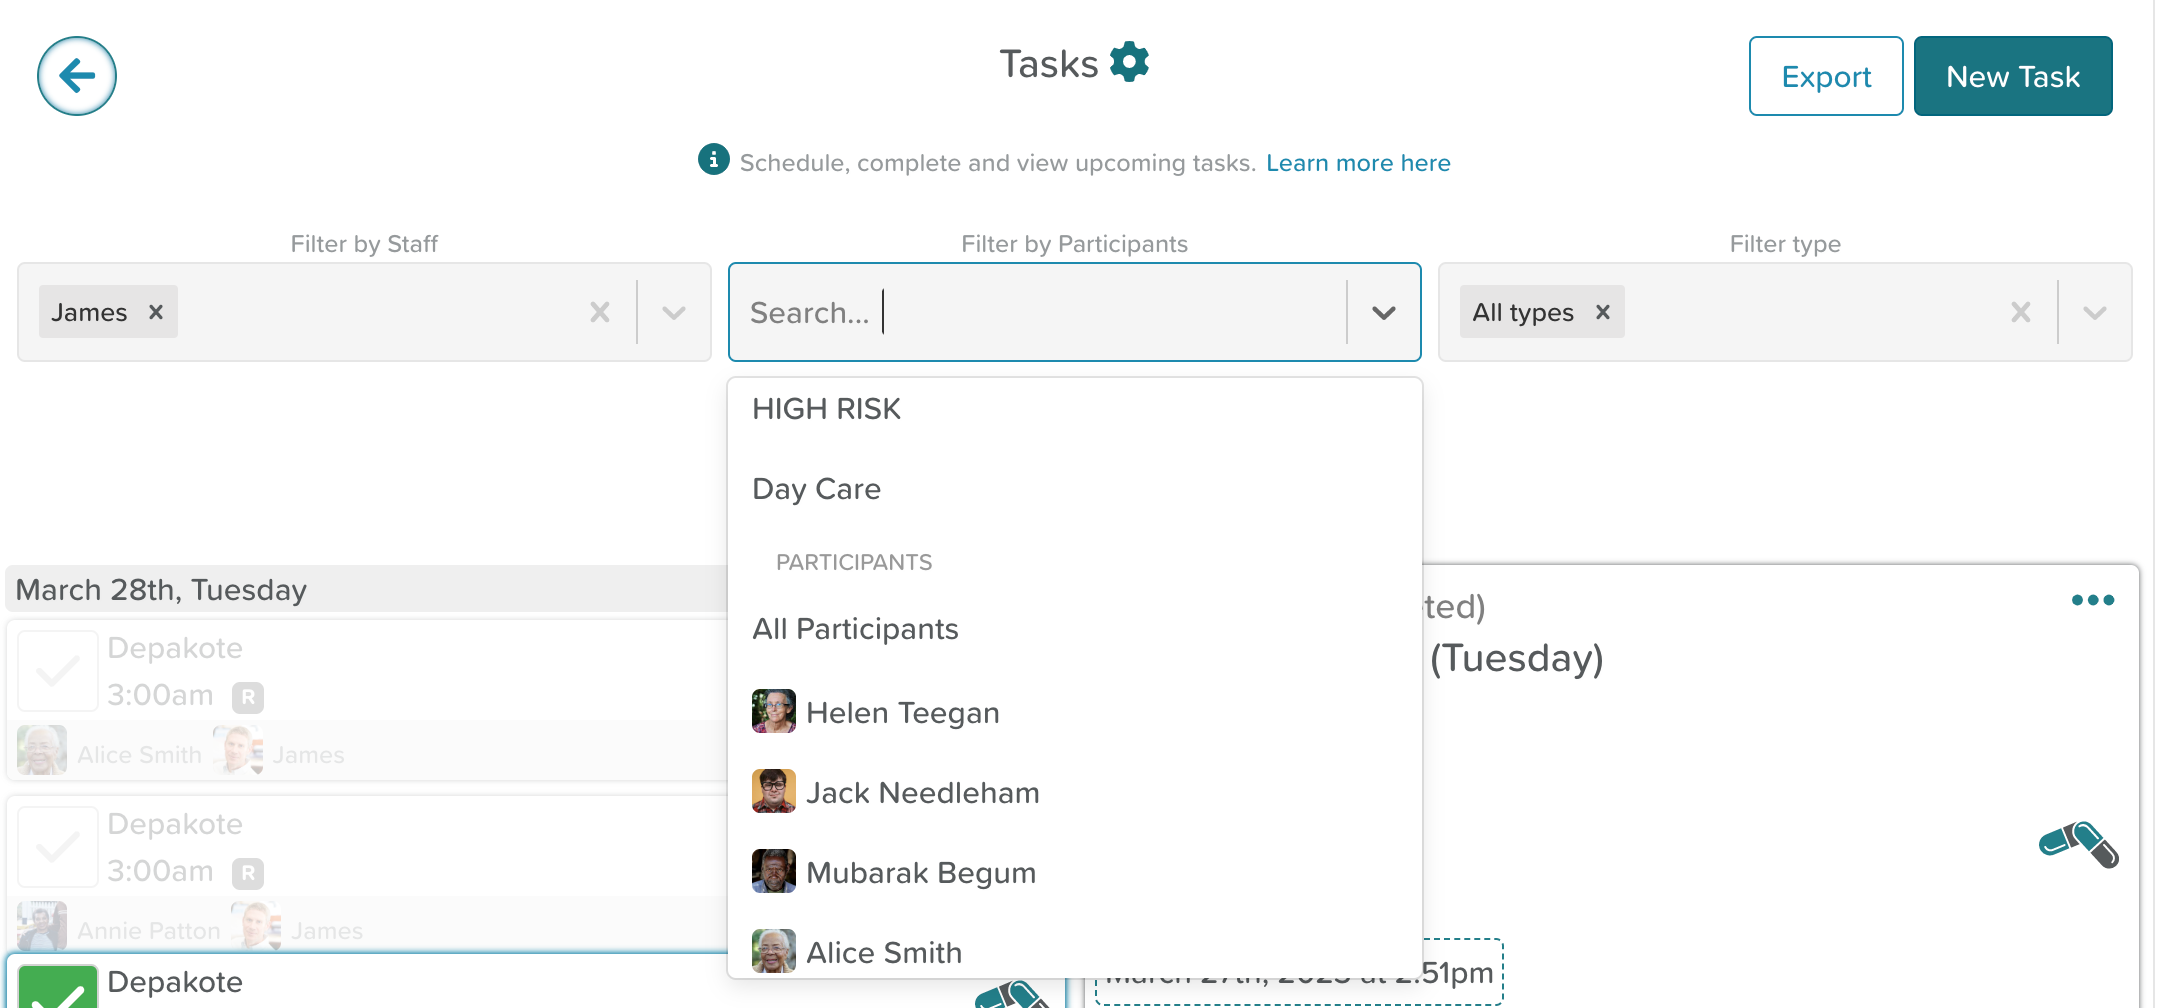
Filter by Staff
It will automatically be filtered for your tasks. If you wish to see tasks assigned to other members of staff (individuals or groups), click on the drop-down menu and make your selection(s).
Filter by Service User
To view tasks for a specific service user, or group of service users, click on the drop-down menu and make your selection(s).
You can also filter by Task Type (i.e. Medication tasks) if you want to see a certain type of task set for all users or a specific individual.
How to use Task Lists (Subtasks)
Subtasks enable multiple tasks to be scheduled within one main task for completion. Subtask lists can also be saved as a template to be re-used on future tasks.
Use cases include:
Setting intake/onboarding subtasks when a new Service User is added (e.g. 4 Assessments and a Care Plan to be completed)
Creating a multi-process task such as 'PM Routine', which may require multiple tasks to be completed (e.g. showering, brushing teeth, toileting, putting on pajamas)
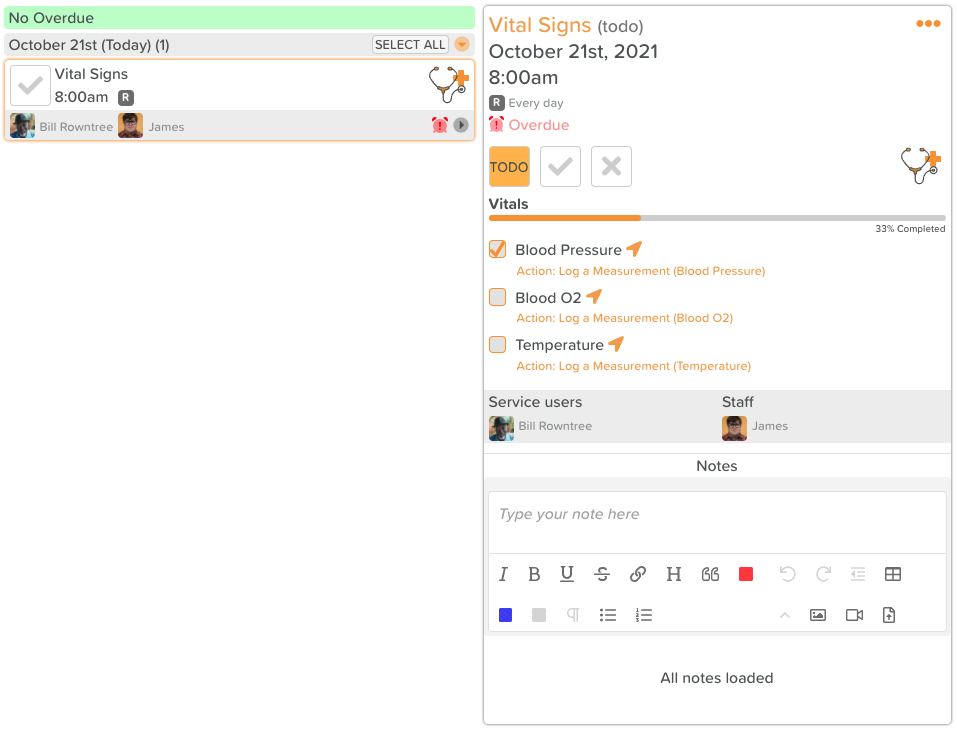
If certain actions are set within a subtask list (i.e. take blood pressure), staff will be able to click on the action directly from the task view and enter the required data from the same page.
Once subtasks are set up, they can be marked as complete by clicking the checkbox next to each subtask within the standard task view.
A percentage completion bar will display, showing up-to-date progress of subtask completion.
Creating a subtask list
When scheduling a new task (or editing an existing one), click 'Add Subtasks'
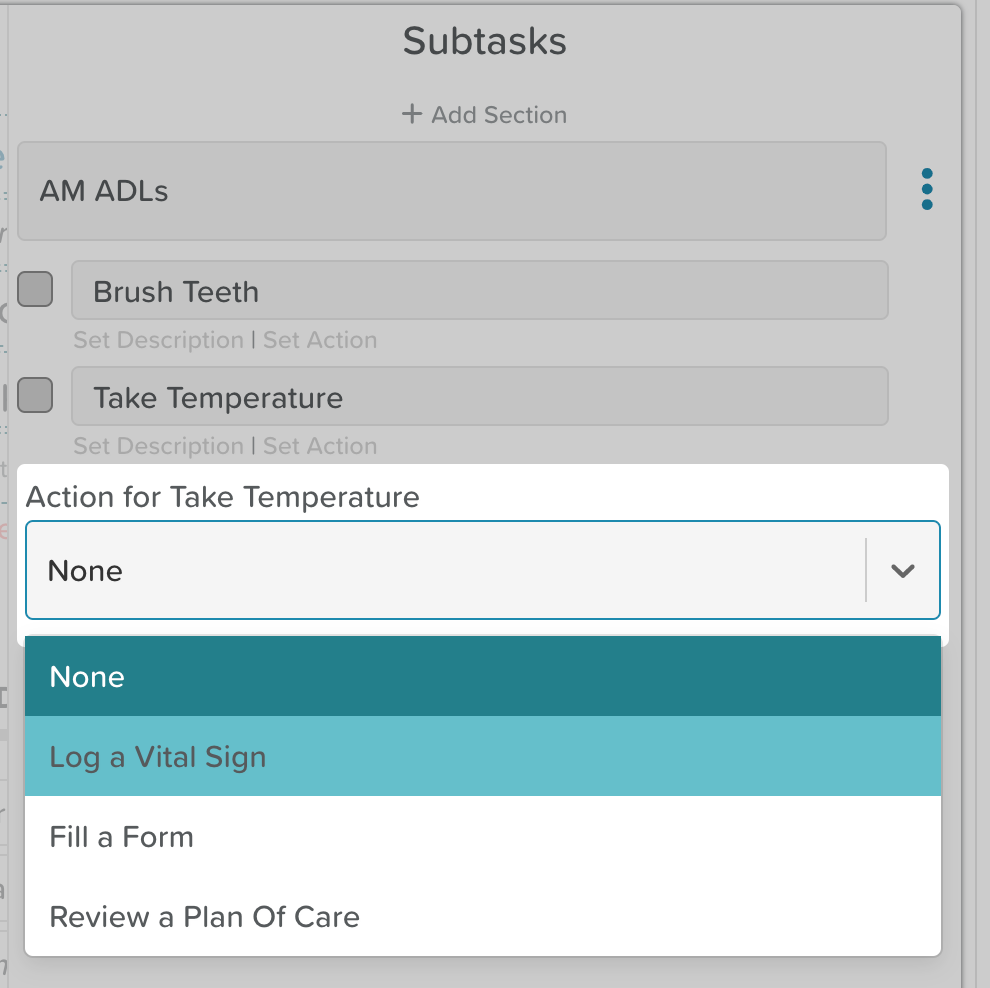
Set a description (optional)
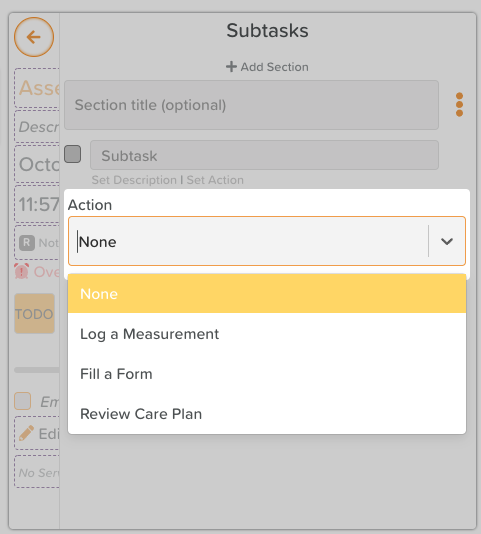
Set an action (optional - This links to other features on StoriiCare)
This could be to Log a Measurement/Vital Sign (i.e. Take blood pressure)
This could be to Fill in a Form (i.e. Waterlow Assessment)
This could be to Review a Care Plan
How to Save a Subtask List
Subtask lists can be saved as Templates, which can then be loaded in the future to be used in other tasks.
Give your Subtask list a title
Click the three dots next to the title
Click 'Save as template'
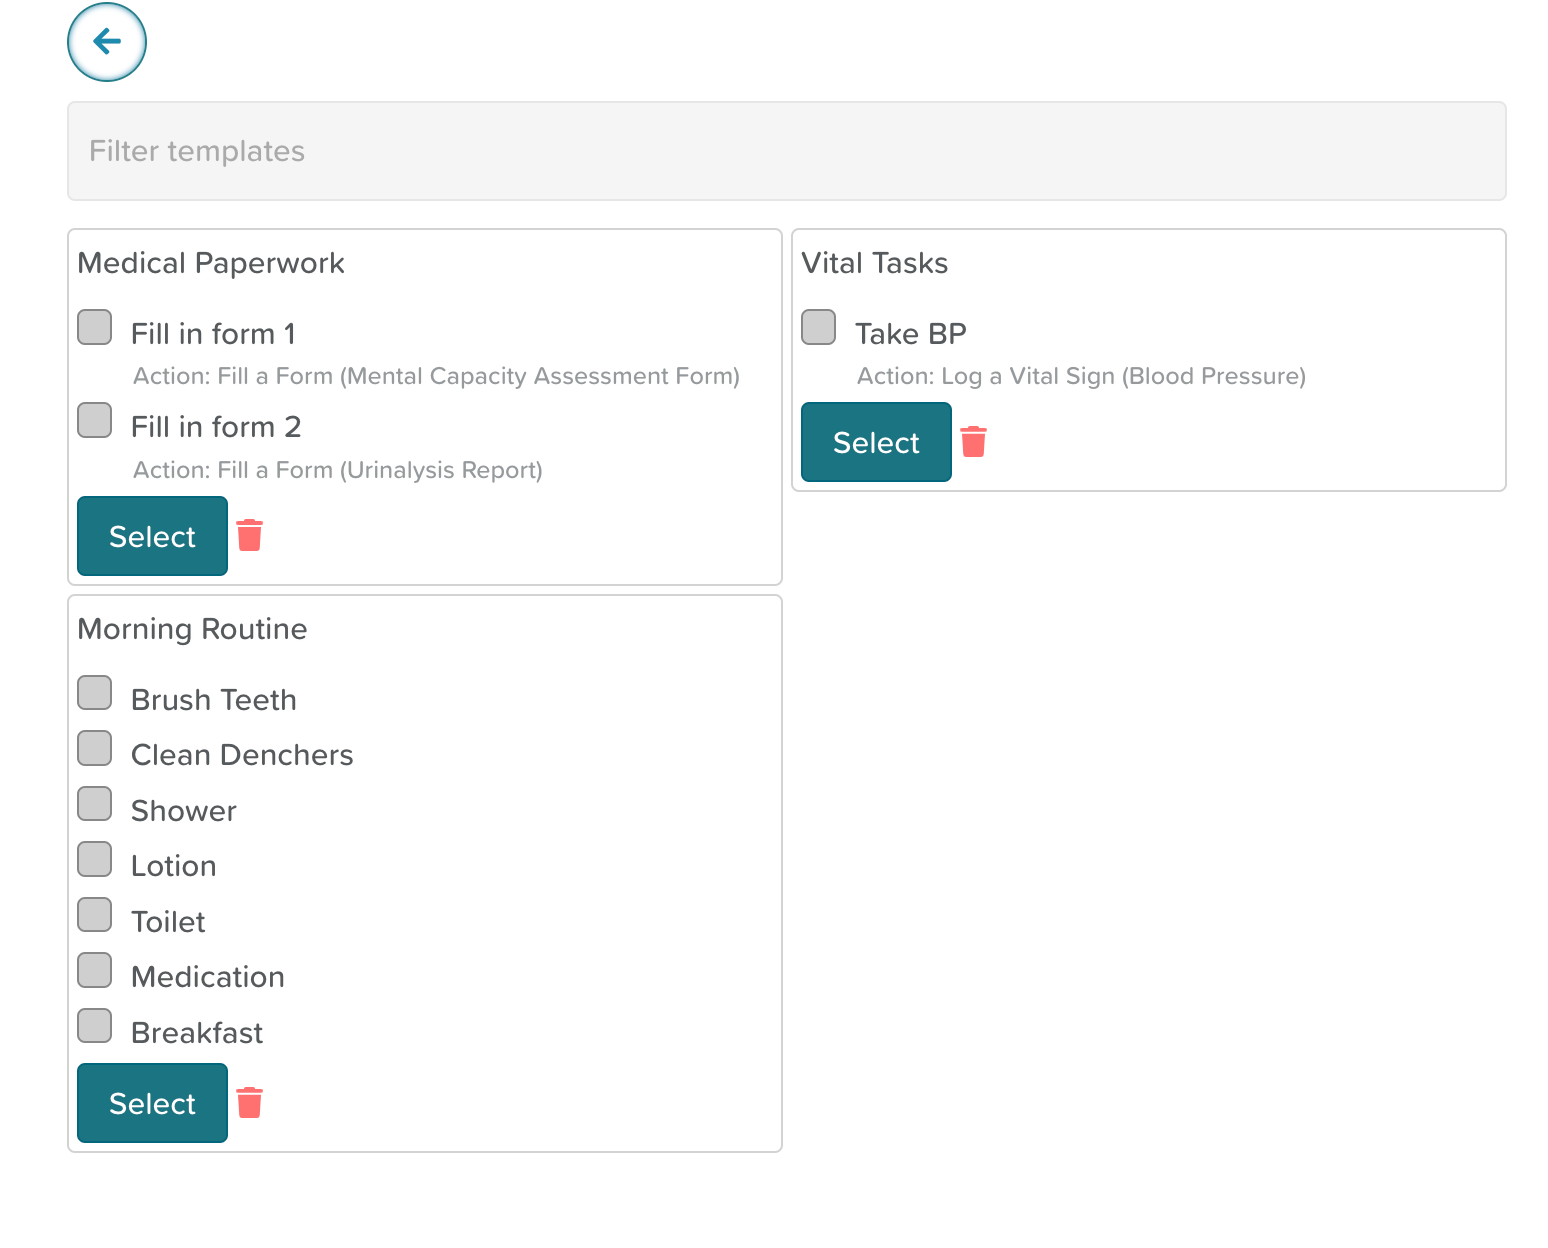
How to Use or Edit a Saved Subtask List
If you've saved a Subtask list as a template, you'll be able to use it again when scheduling new tasks.
Open your task and click 'Add Subtasks' or 'Edit Subtasks'
Click the three dots next to the Subtask title field
Click 'Load a template'
From here, select which template you'd like to insert
If you want to make changes to the template, you can do that now
Save the changes you've made
(Load a template view)