
A Guide to Using Incidents & Accidents
Detailed instructions on how to use our Incidents/Accidents feature are provided below. You may also choose to watch this video overview:
How to Record an Incident or Accident
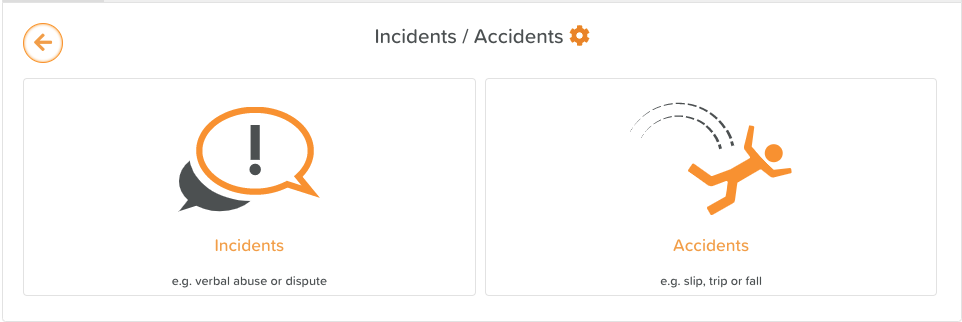
Select Incidents/Accidents from the Dashboard
Choose Incident or Accident
Click 'Add' in the top, right-hand corner
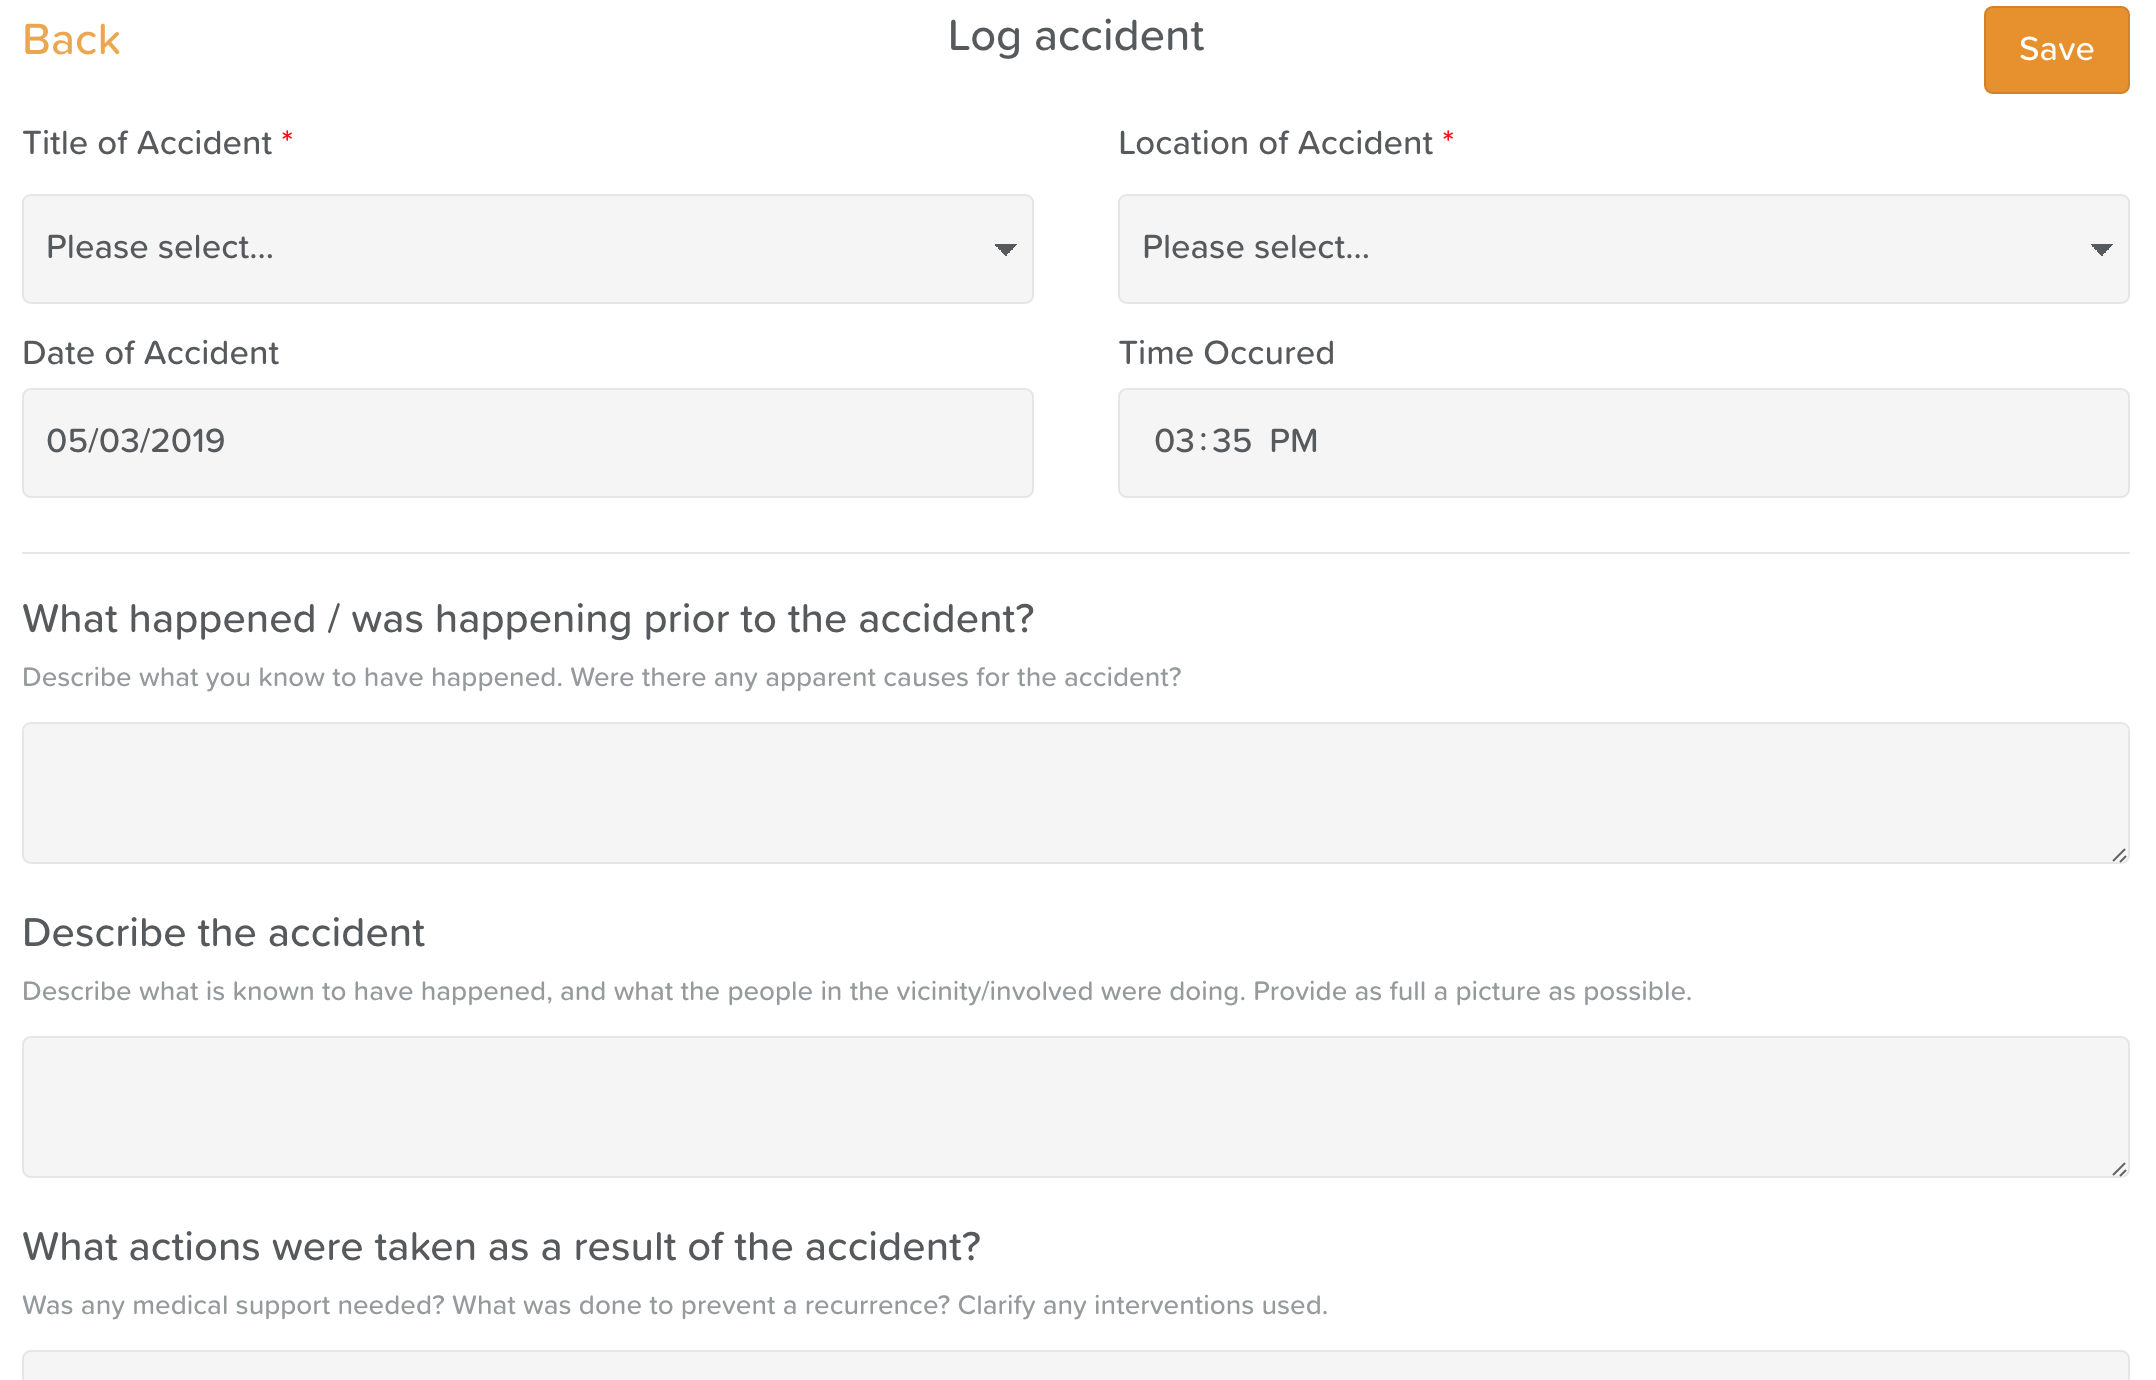
3. Fill in the form to specify:
Type of incident/accident that occurred
Time of occurrence
Date of occurrence
Location of occurrence
What happened prior to the incident/accident
A description of what happened
What actions were taken as a result
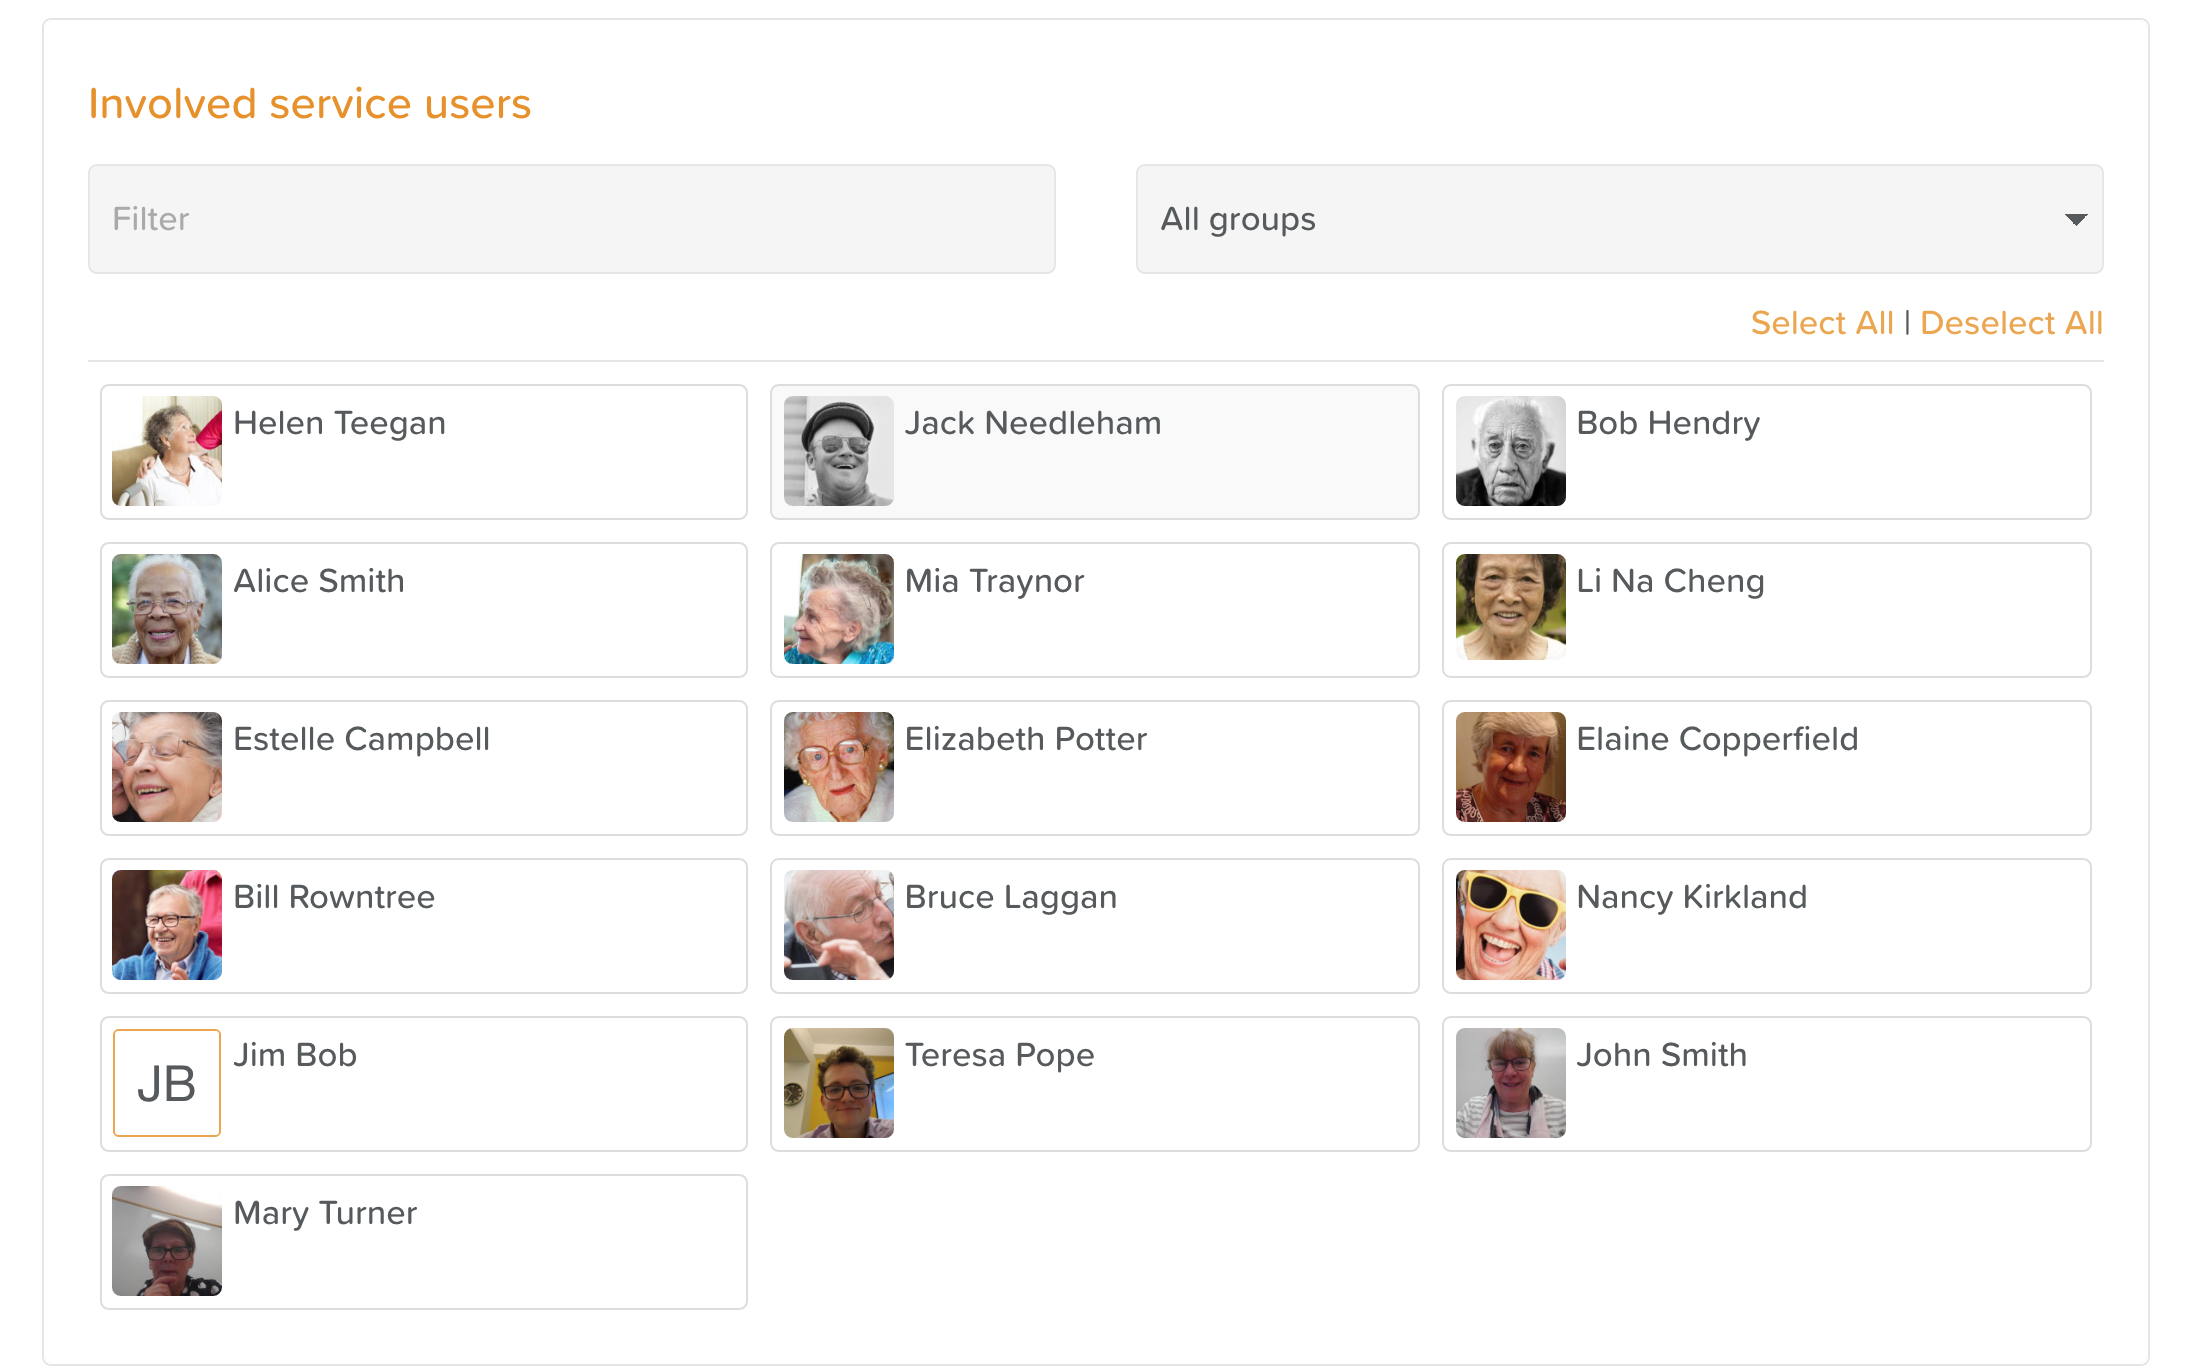
Who was involved (select from Service Users & Staff)
4. Please note, if filling out an Accident form, once you click on a service user involved, this screen will appear. Please specify:
Whether or not they were injured (select Not Injured box at the top if unharmed)
The severity level of the injury (scale 1-5)
Individual notes (individual notes may also be recorded on the Incident form)
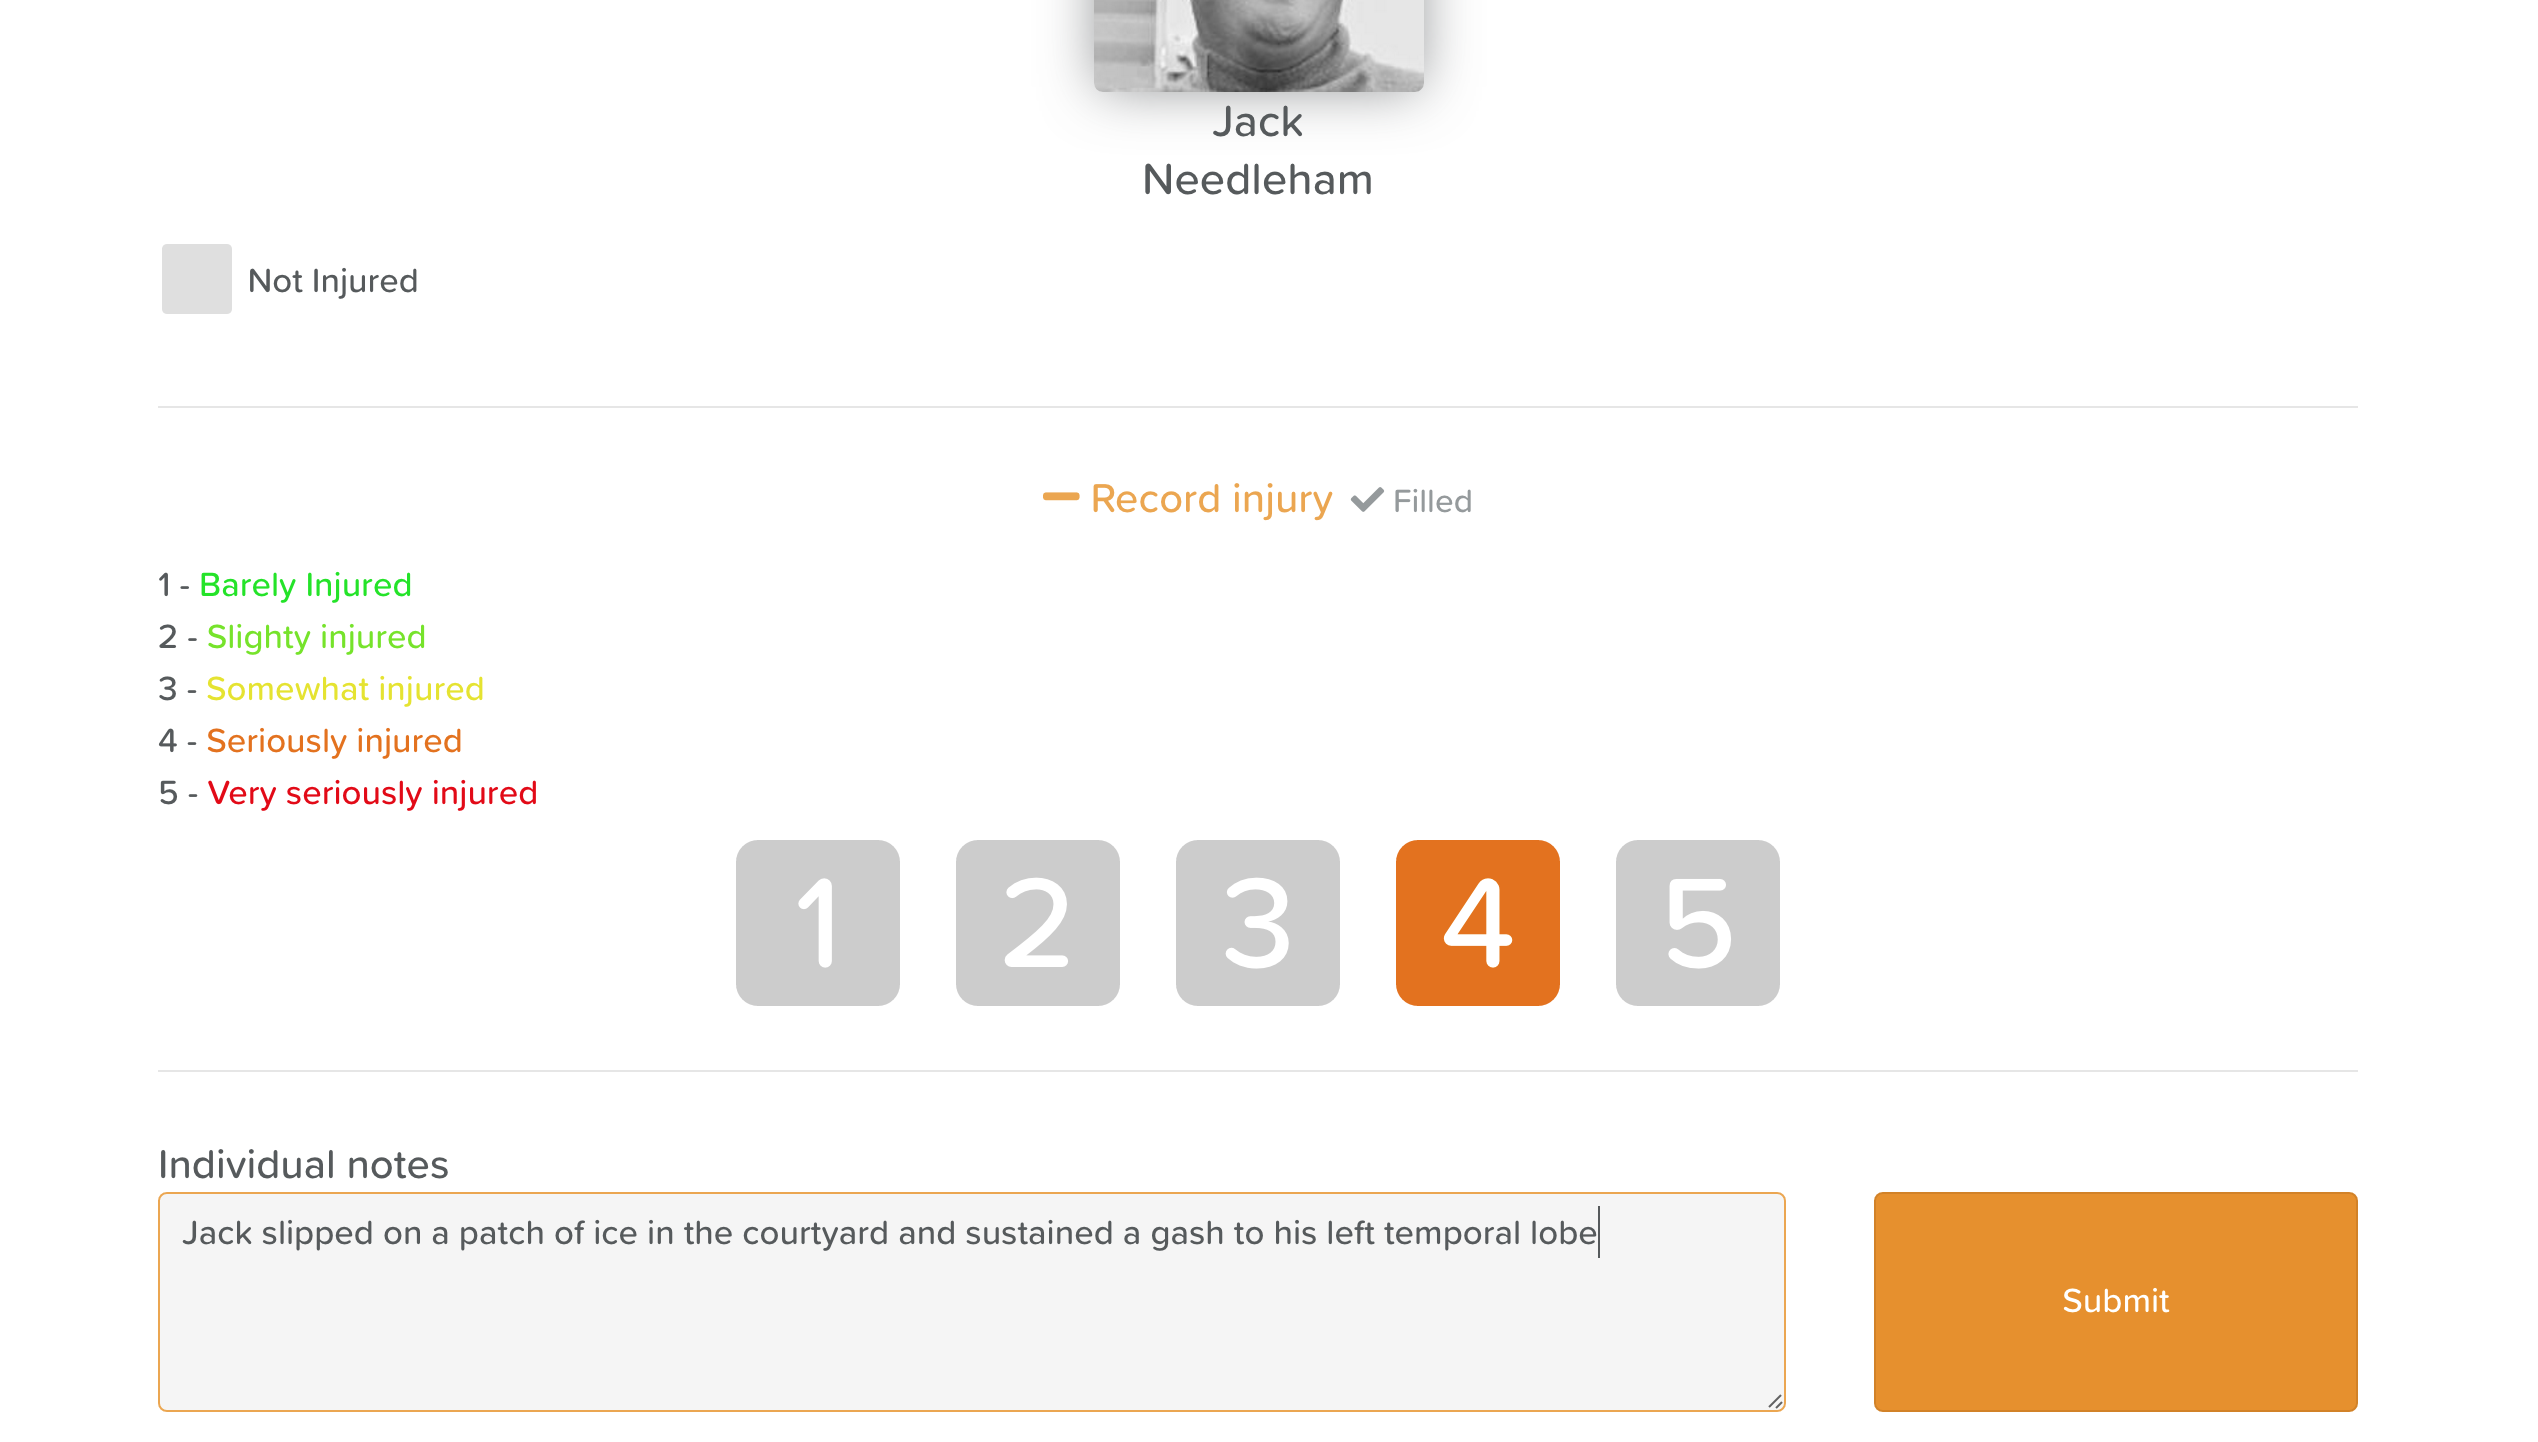
5. Hit Submit when finished
6. Scroll to the top and hit Save when you are completely done filling in the form
NOTE: For any incident or accident recorded, management is notified and required to comment. This is to ensure that appropriate measures are taken post-event.
How to Comment/Sign Off on Incident & Accident Reports (for Management)
From the main Dashboard, switch the toggle from All Staff to Management

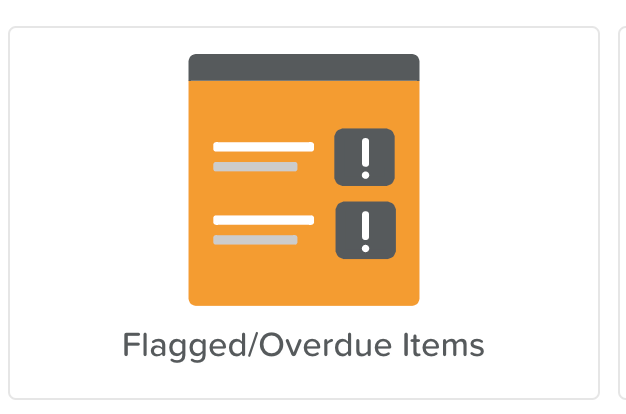
2. Then select Flagged/Overdue Items
3. Click into Uncommented Incidents or Uncommented Accidents.

4. Scroll to the bottom of the incident or accident you're looking for. You will find a comment box to fill in
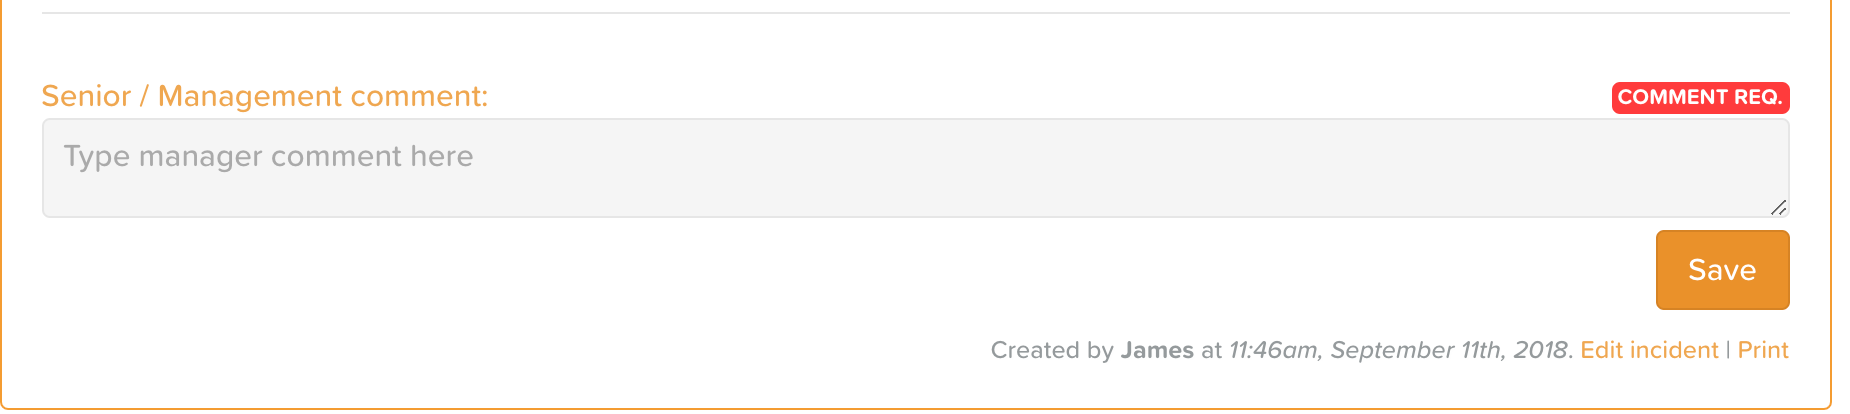
5. Be sure to hit Save when you are done
Managing Notifications for Incidents & Accidents
To ensure all responsible parties receive email notifications anytime an Incident or Accident report is filed, you'll need to add their email addresses within the feature settings.
If you have Settings Access, you will see the Settings cog next to Incidents/Accidents.

Click the + button to add an email address. Click on the pencil icon to enter the name and email address. Make sure to hit the disc icon to save.
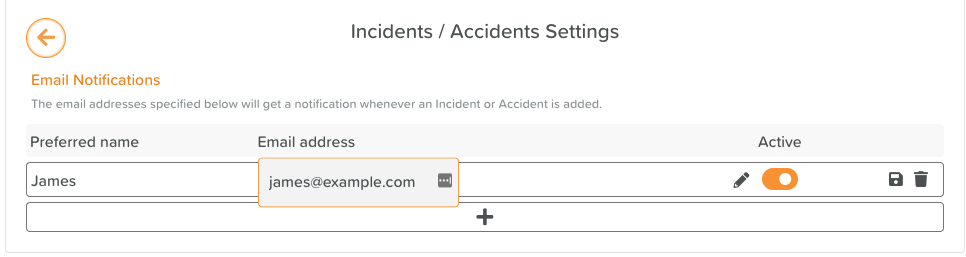
If you wish to remove someone from receiving notifications, click on the trash bin icon or turn the Active toggle off.
Viewing, Printing & Exporting Incident or Accident Reports
Click on Incidents/Accidents from the Dashboard
Click on Incidents or Accidents
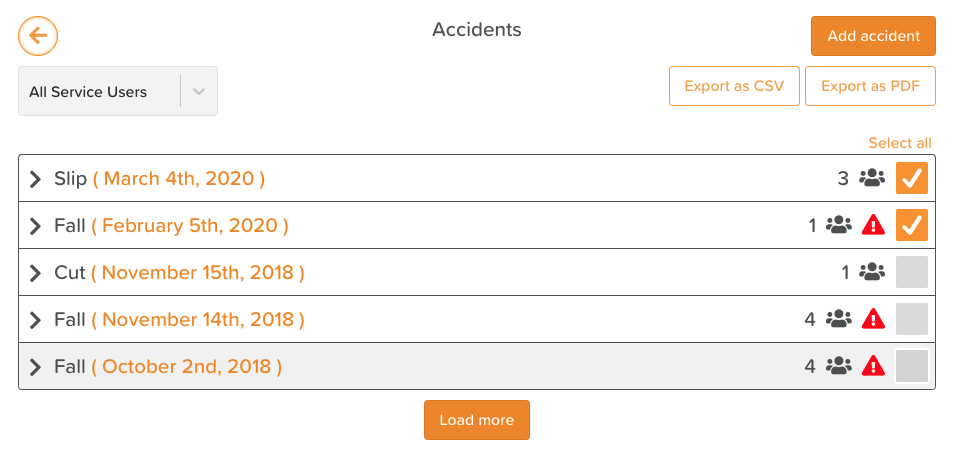
To view a report, click on it to see expanded details.
You can also filter by Service User.
If you wish to print or export reports, you can select which reports to generate by clicking on the gray boxes and then choosing your export option.
How to Edit or Print Incident & Accident Forms
Find the form you are looking for and scroll to the bottom.

To Print/Export
You will see Print text below. Click on this and either print from your device or download as a PDF document to share via email or store in a designated folder.
To Edit
You will see the Edit incident and Edit comment text. Only management will be able to edit their comment. Click on these to make necessary revisions to the form.