How to create an Invoice
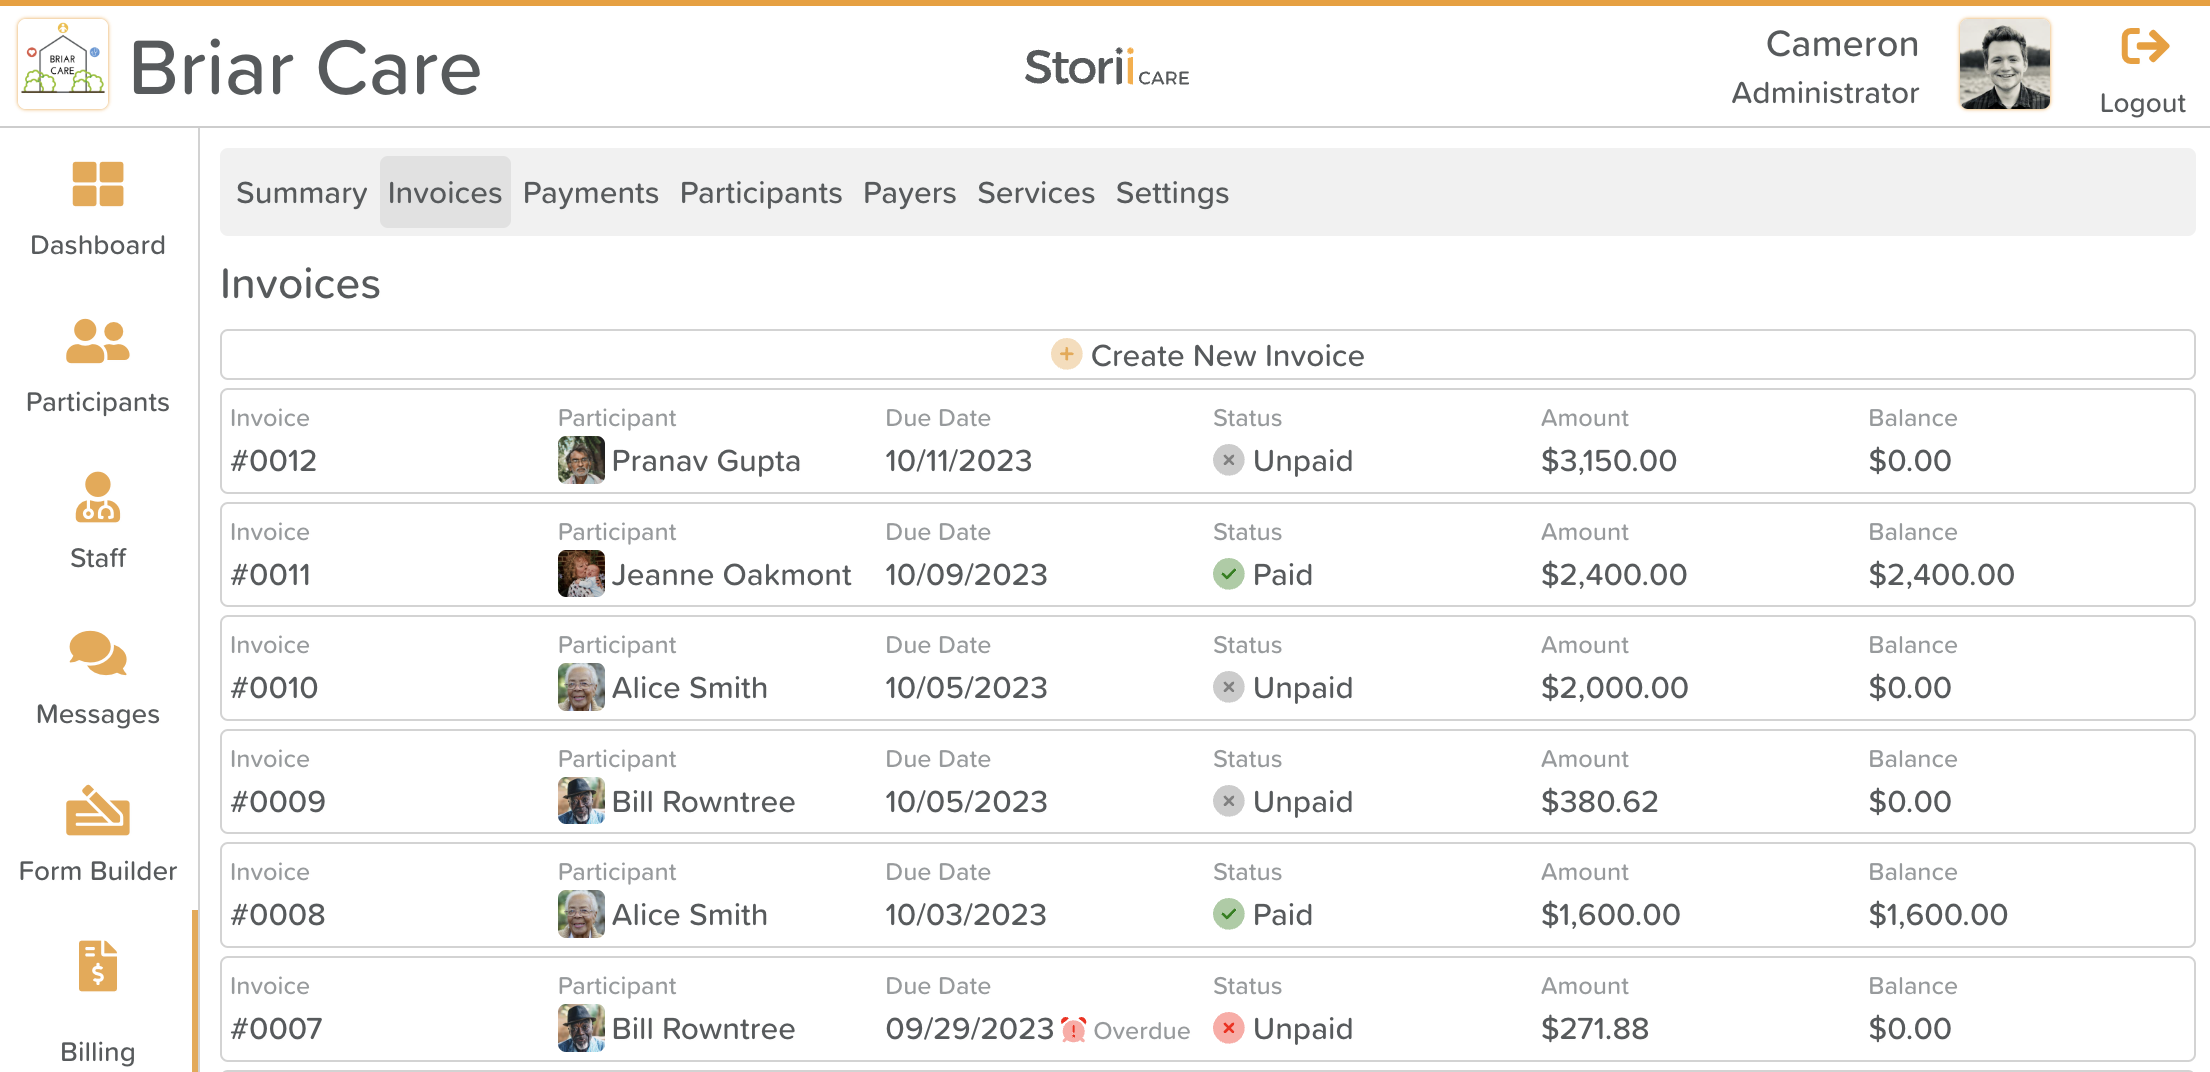
To create an invoice on StoriiCare Billing, select the 'Invoices' tab within the Billing feature. Select the 'Create New Invoice' button at the top of the Invoice view. You will then be presented with the Draft Invoice View.
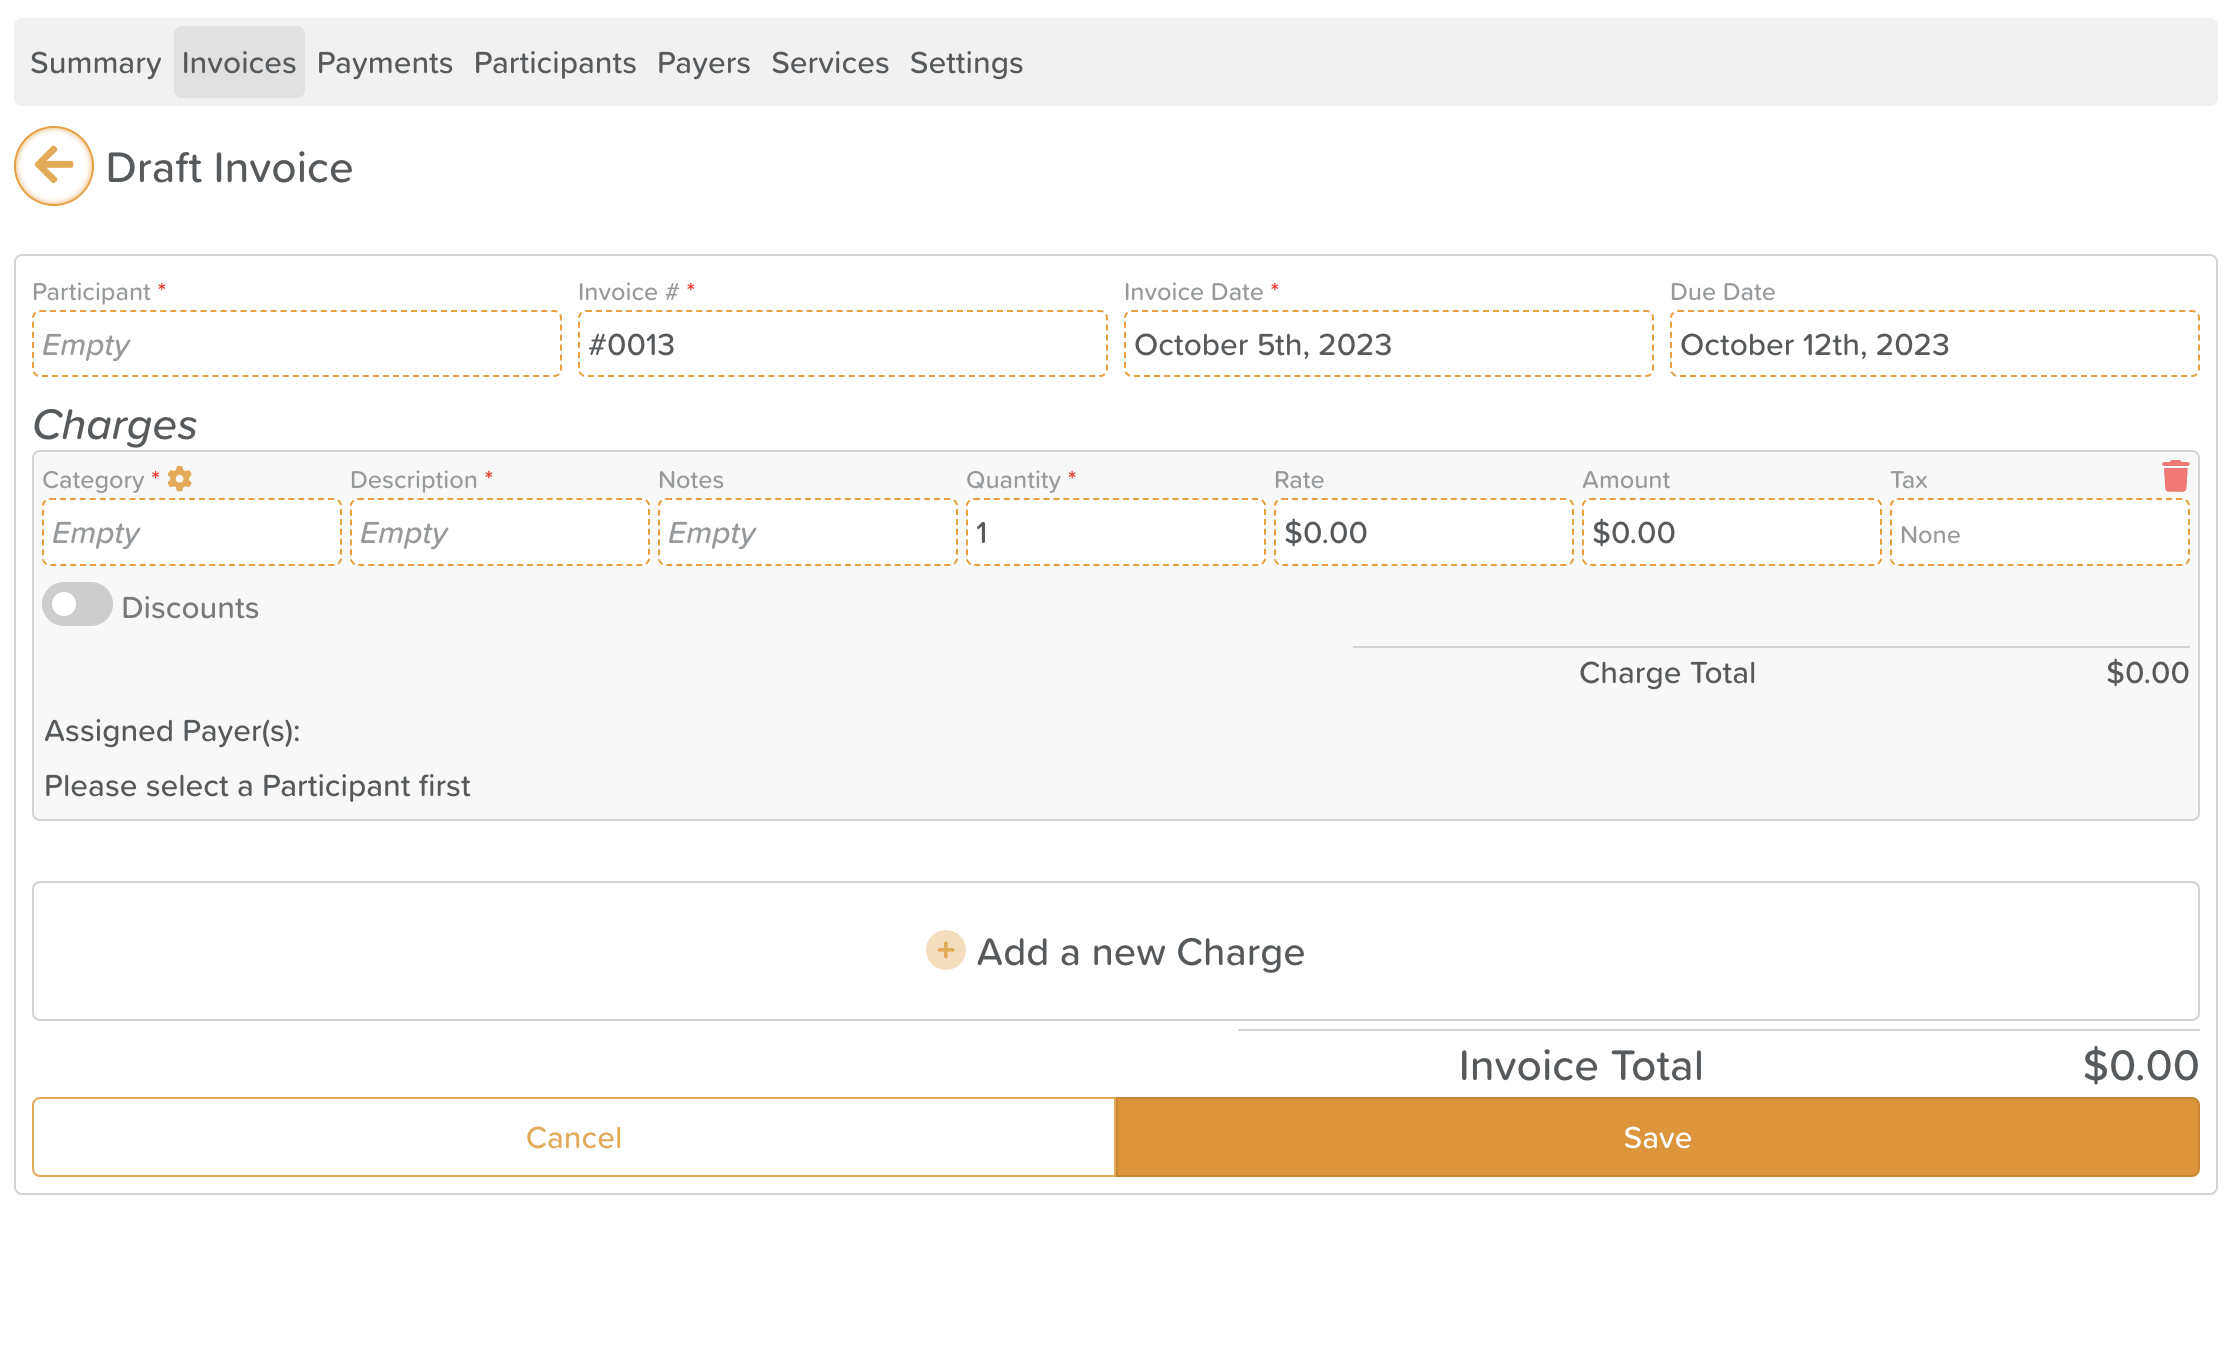
Populate your invoice by first selecting the participant to apply it to.
You will then need to select the category of the invoice. Categories pull from our Lists feature. Ensure you have a list available to pick from for your Invoice Categories. If you don't currently have one, we recommend using this list:
Admission Fee
Daily Attendance Fee
Transportation
Meals and Snacks
Specialized Therapies
Personal Care Services
Medication Management
Special Activity
Outing
Overnight Respite Care
Specialized Program
Equipment Rental
Additional Supplies
Beauty and Barber Services
Counseling
Late Pick-Up Fee
Guest Meal
Special Dietary Needs
Emergency Medical Services
Membership Fee
Workshop
Class Fees
A description must then be entered to describe the invoice. A notes area is also available for longer descriptions or additional information.
Next, quantity can be set (where required). If your invoice does not require a quantity it can remain set to 1.
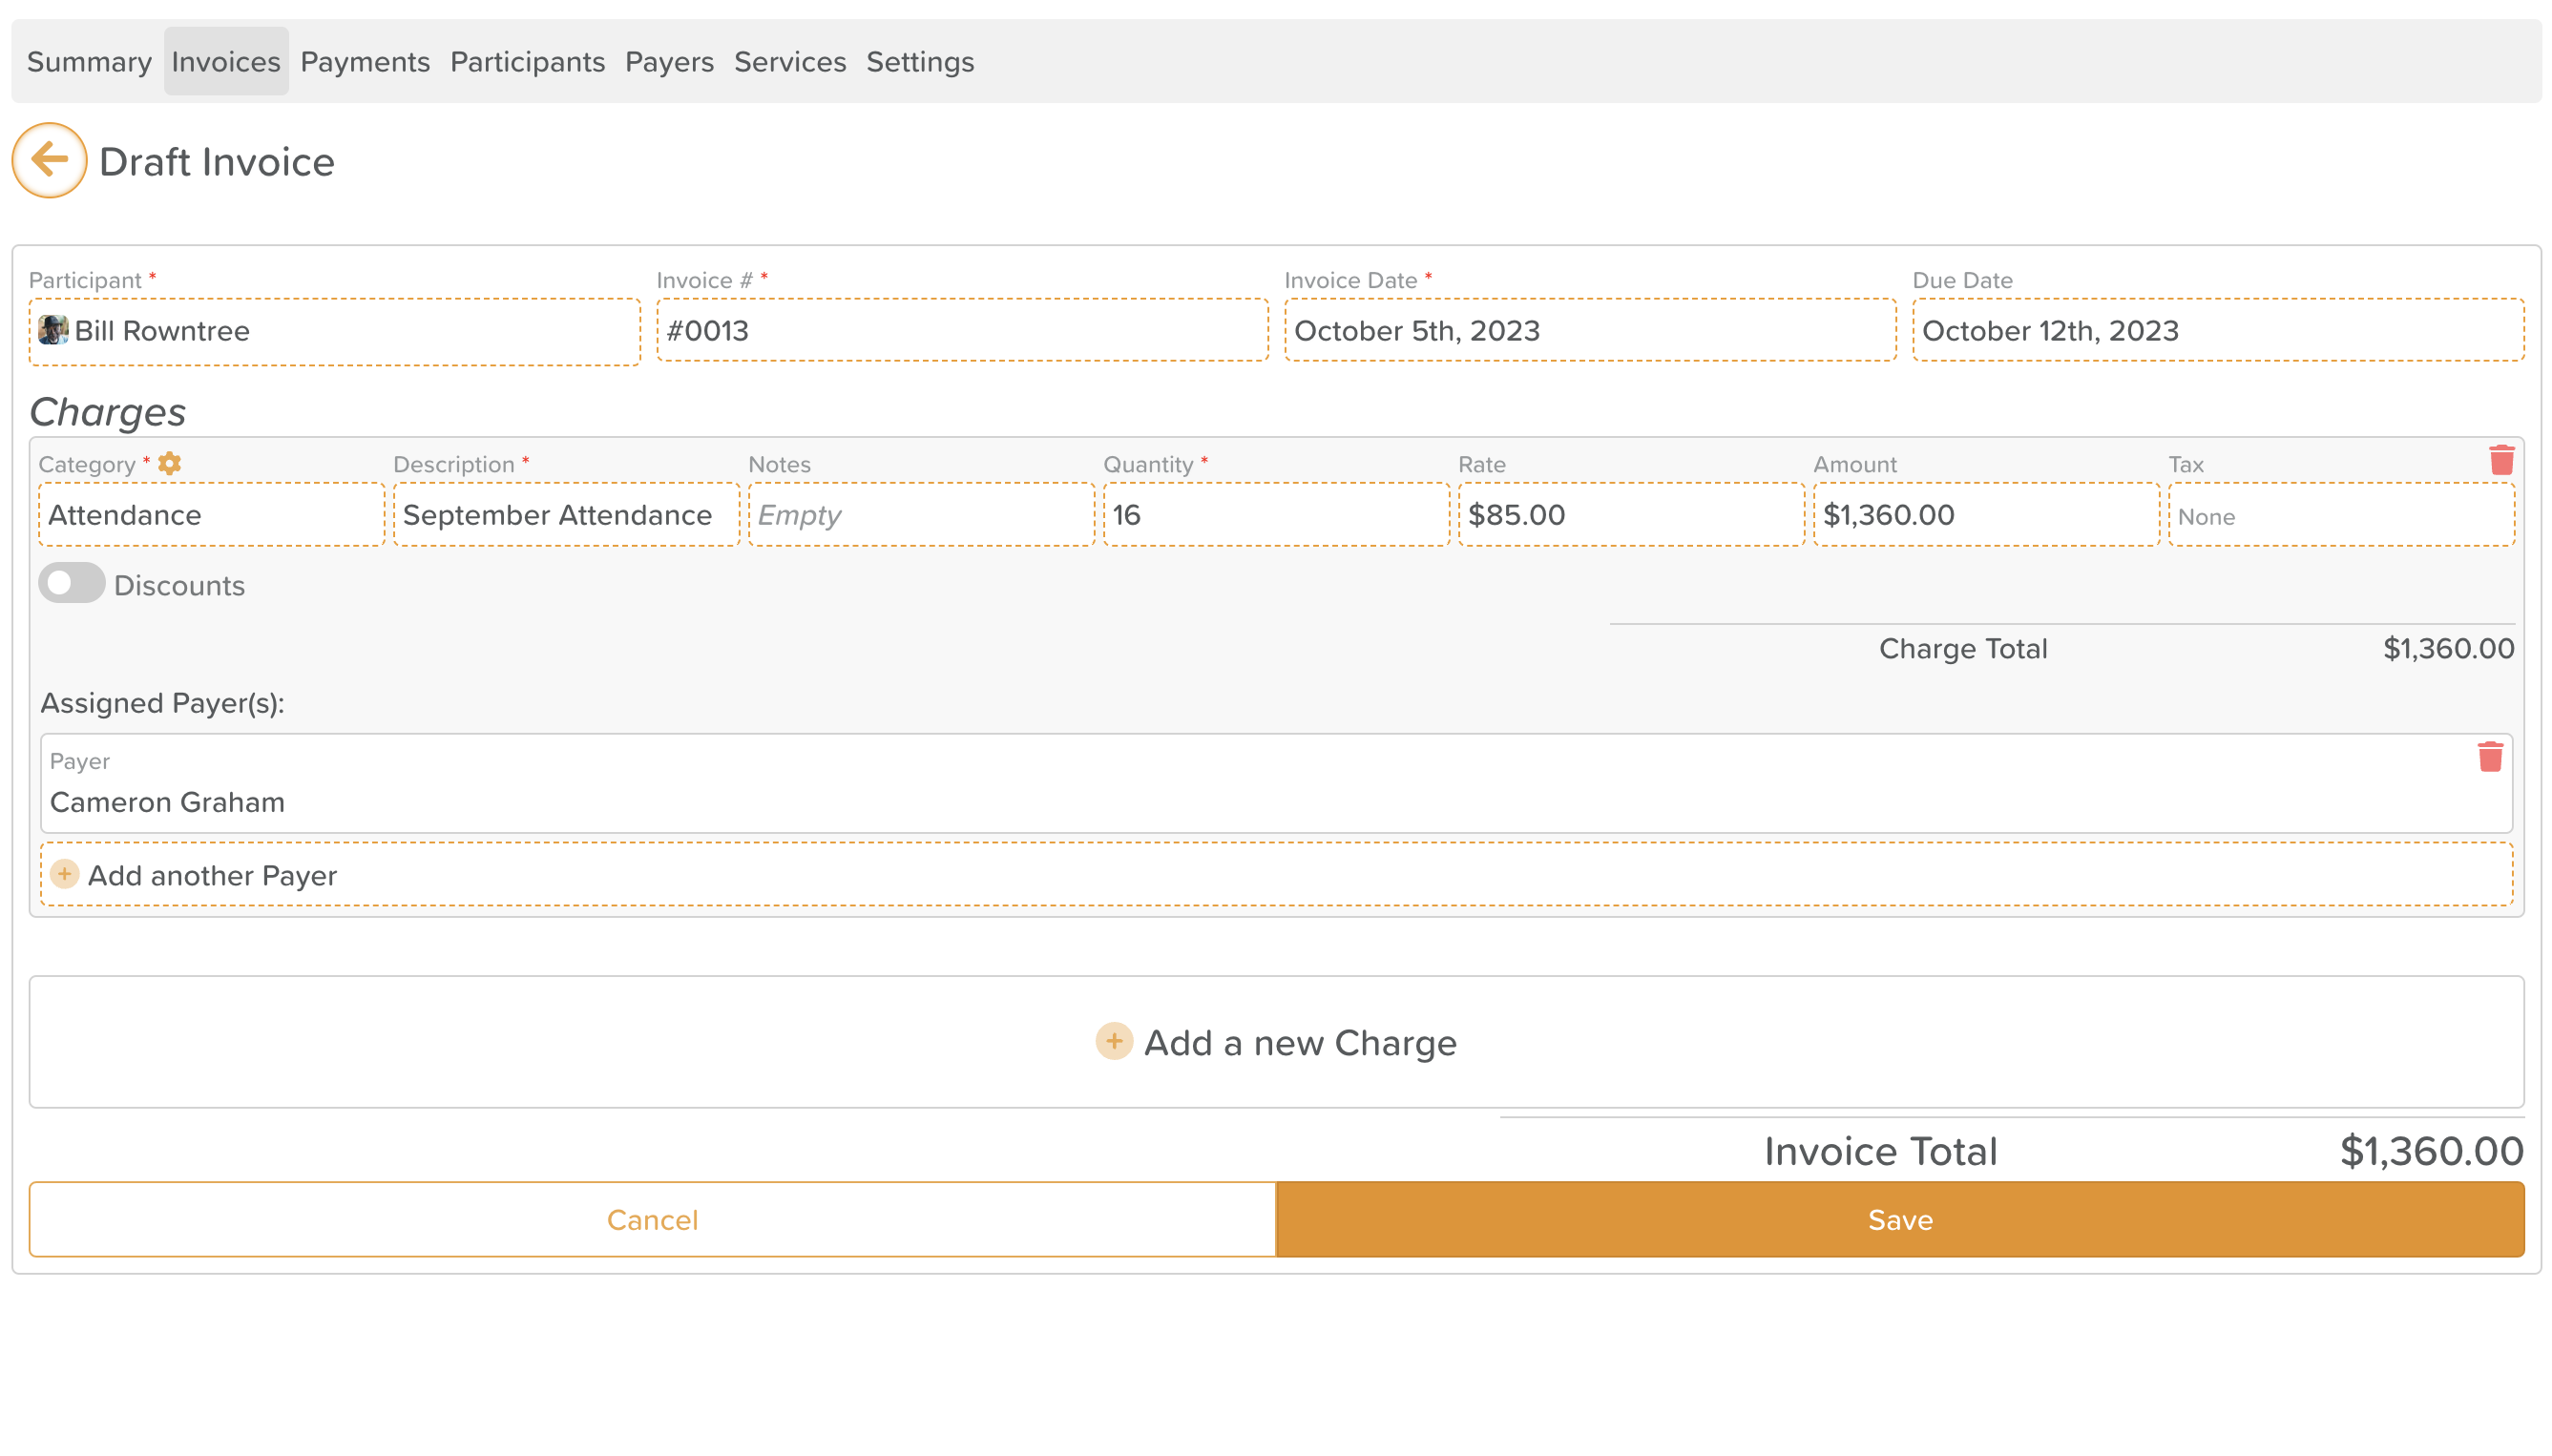
Then, enter a rate for charge. If you have a quantity set, the rate will be multiplied by the quantity to generate an amount.
If you are required to charge any form of Tax on your invoice, select the Tax area to choose a custom Tax rate and whether that tax percentage is inclusive or exclusive. Note that similar to Invoice categories, you must have a Tax rate list available to select from.
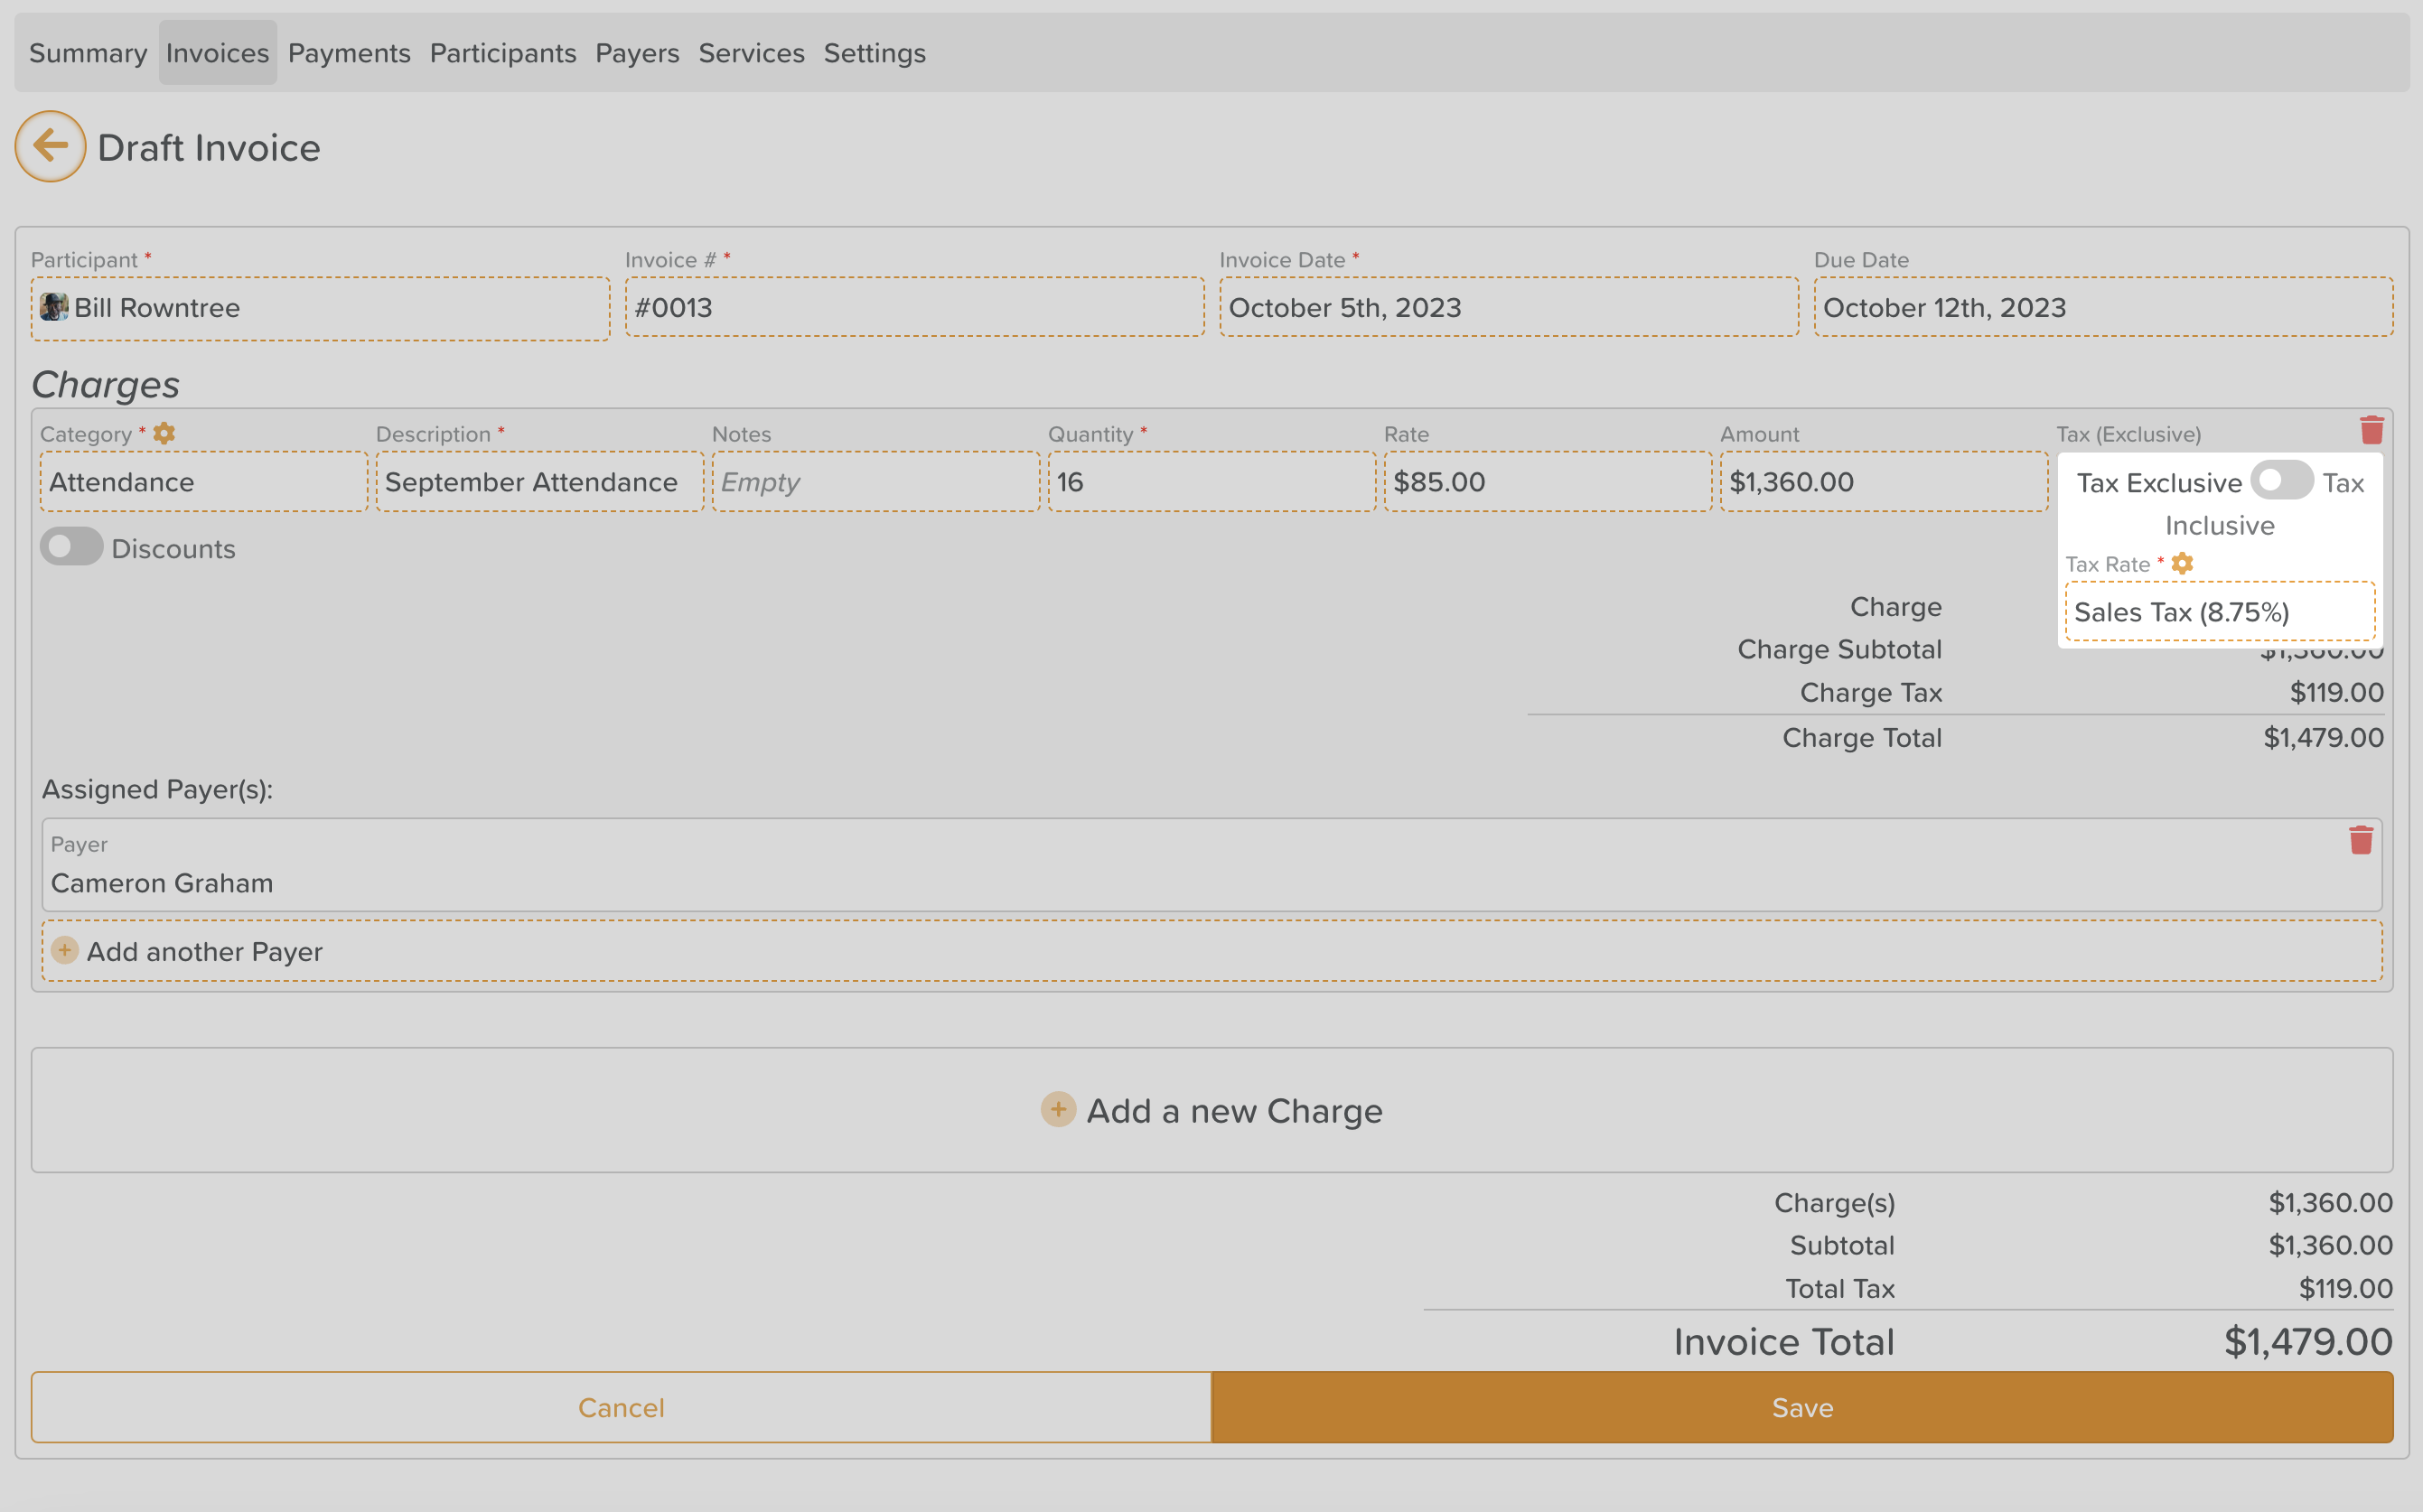
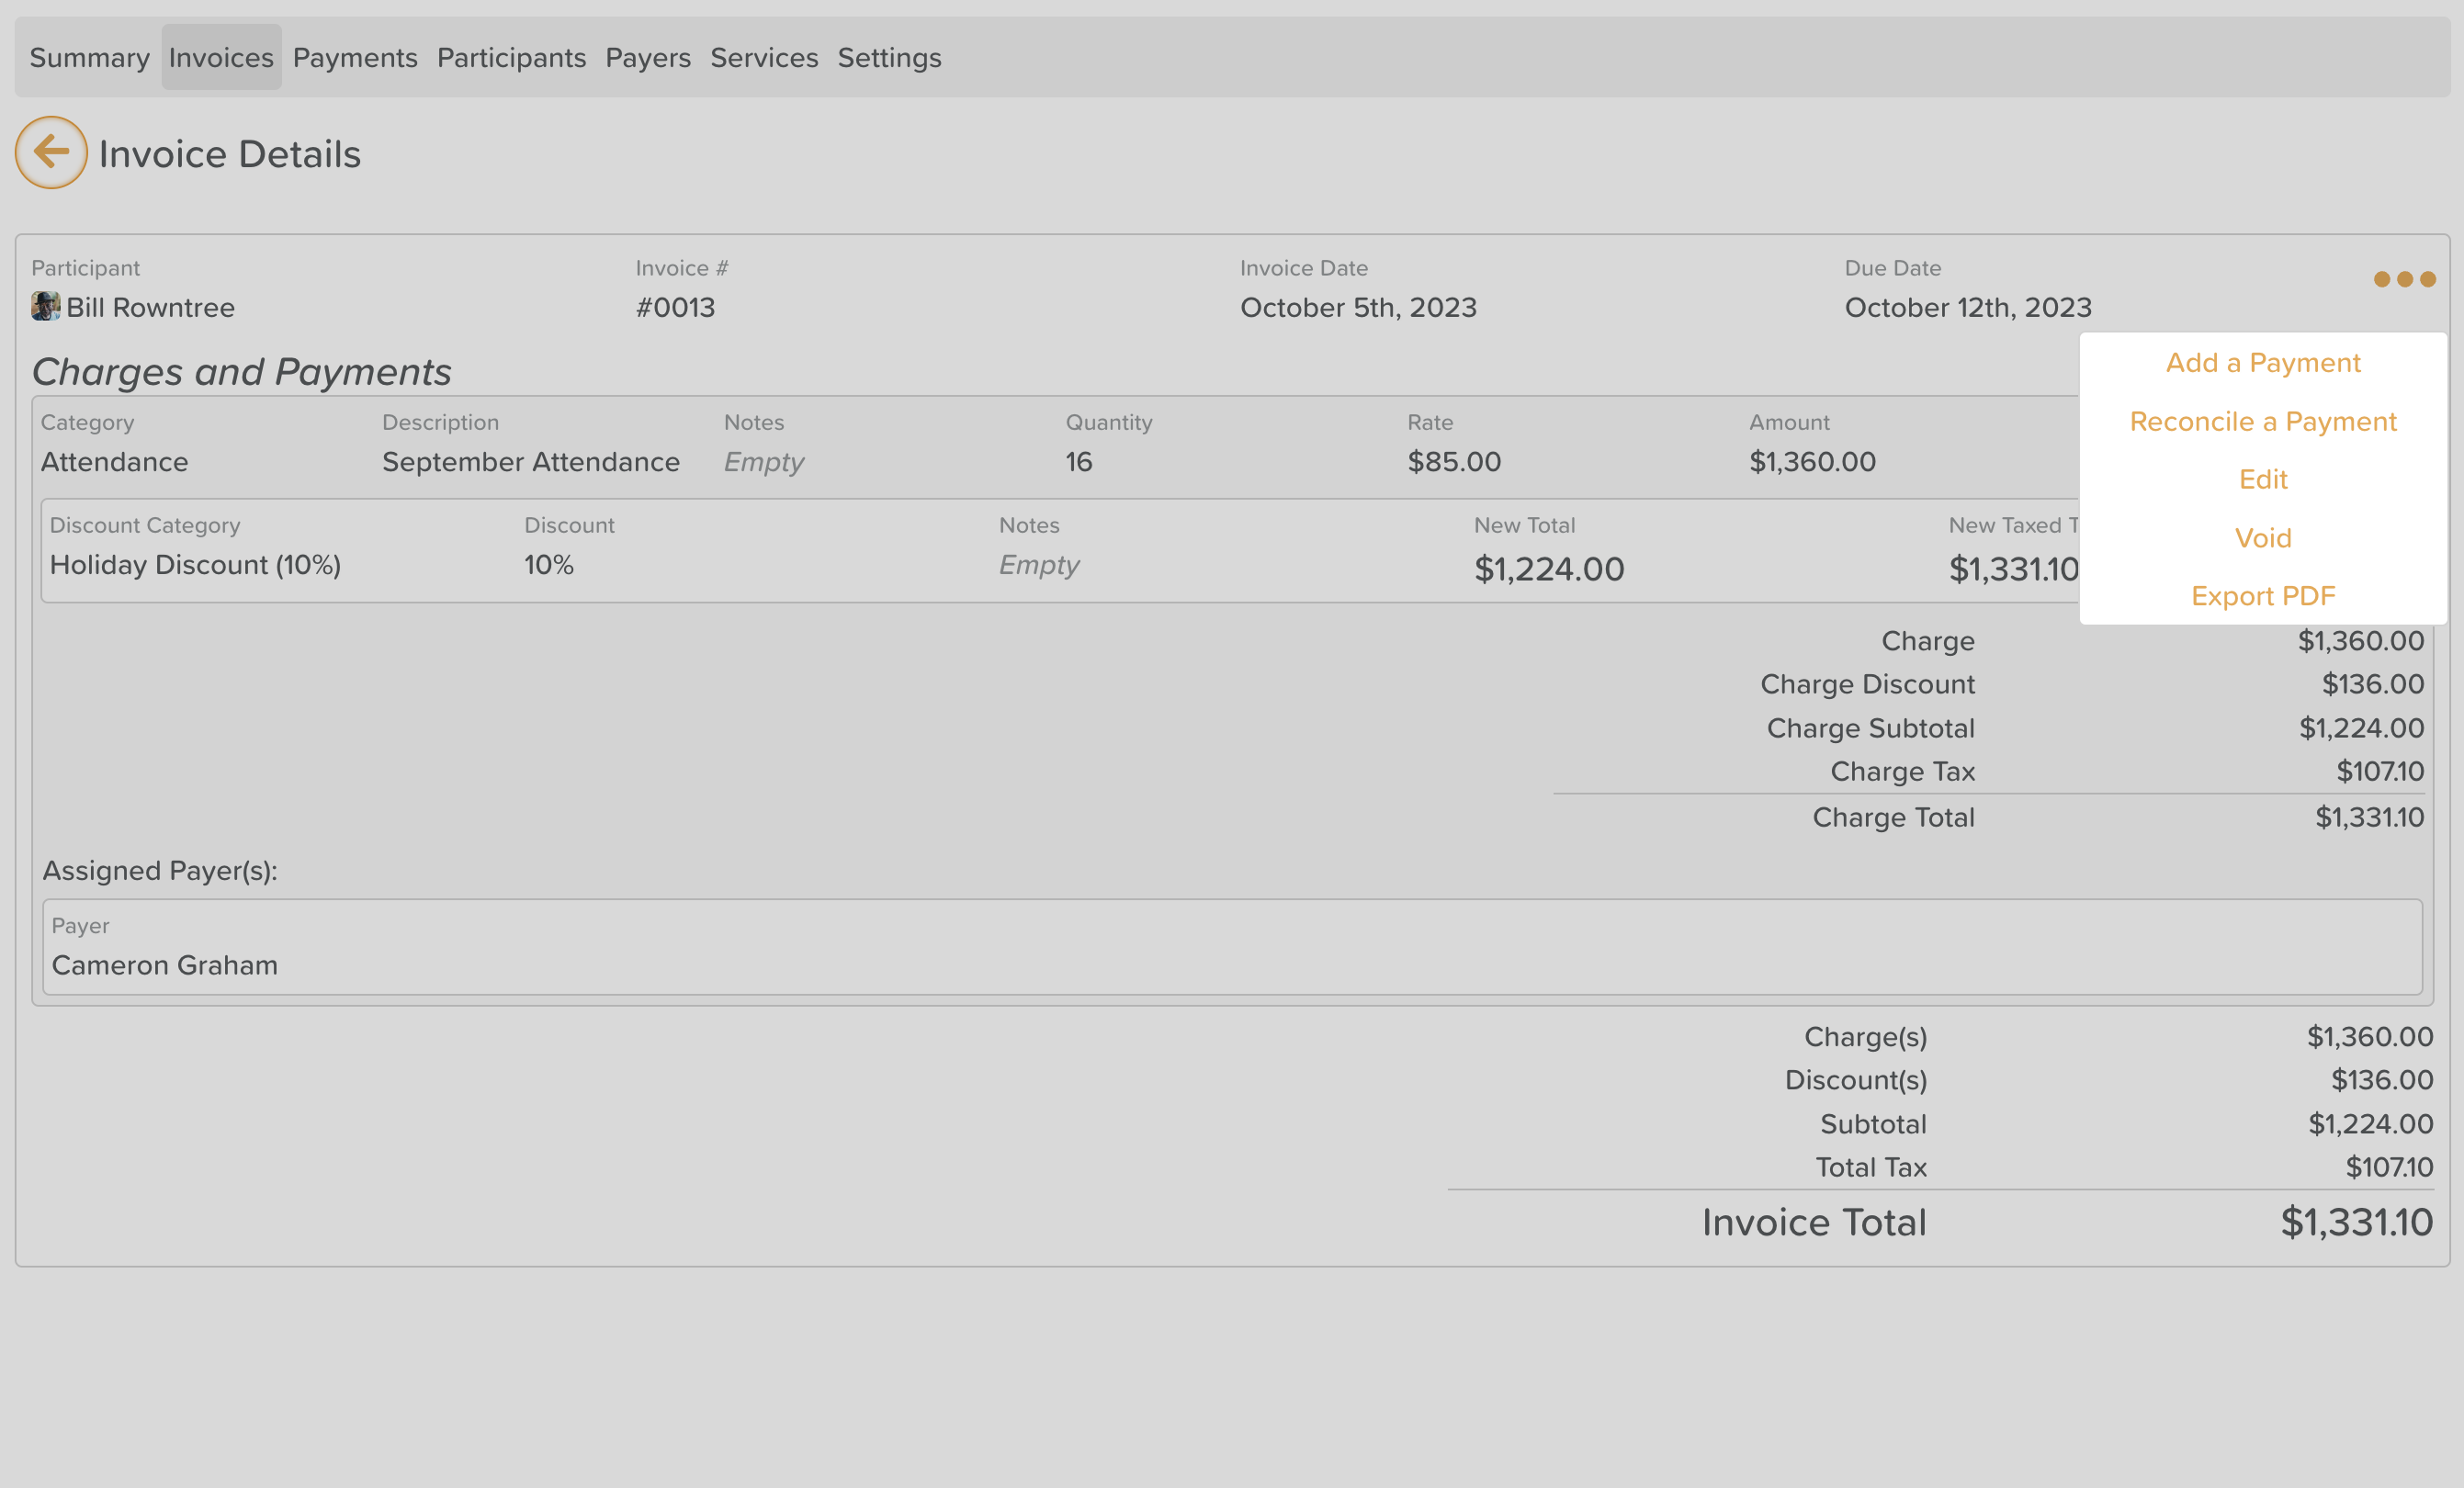
If you require any discounts to be applied, select the discounts toggle to the left of the screen. Discounts can be percentage based or numerical based, depending on the list type you select from to populate your discounts. Multiple discounts can be added where required.

Next, a Payer must be assigned to the invoice. A Payer may be preassigned to the invoice based on the Participant you select. You can change an assigner payer by selecting the red trash can icon to the right hand side. If an invoice is being split between multiple payers, select the 'Add another Payer' option.
If your invoice has multiple charges or lines, you can add these by selecting ' Add a new Charge '.
Be sure to create your invoice by selecting the 'Save' button.
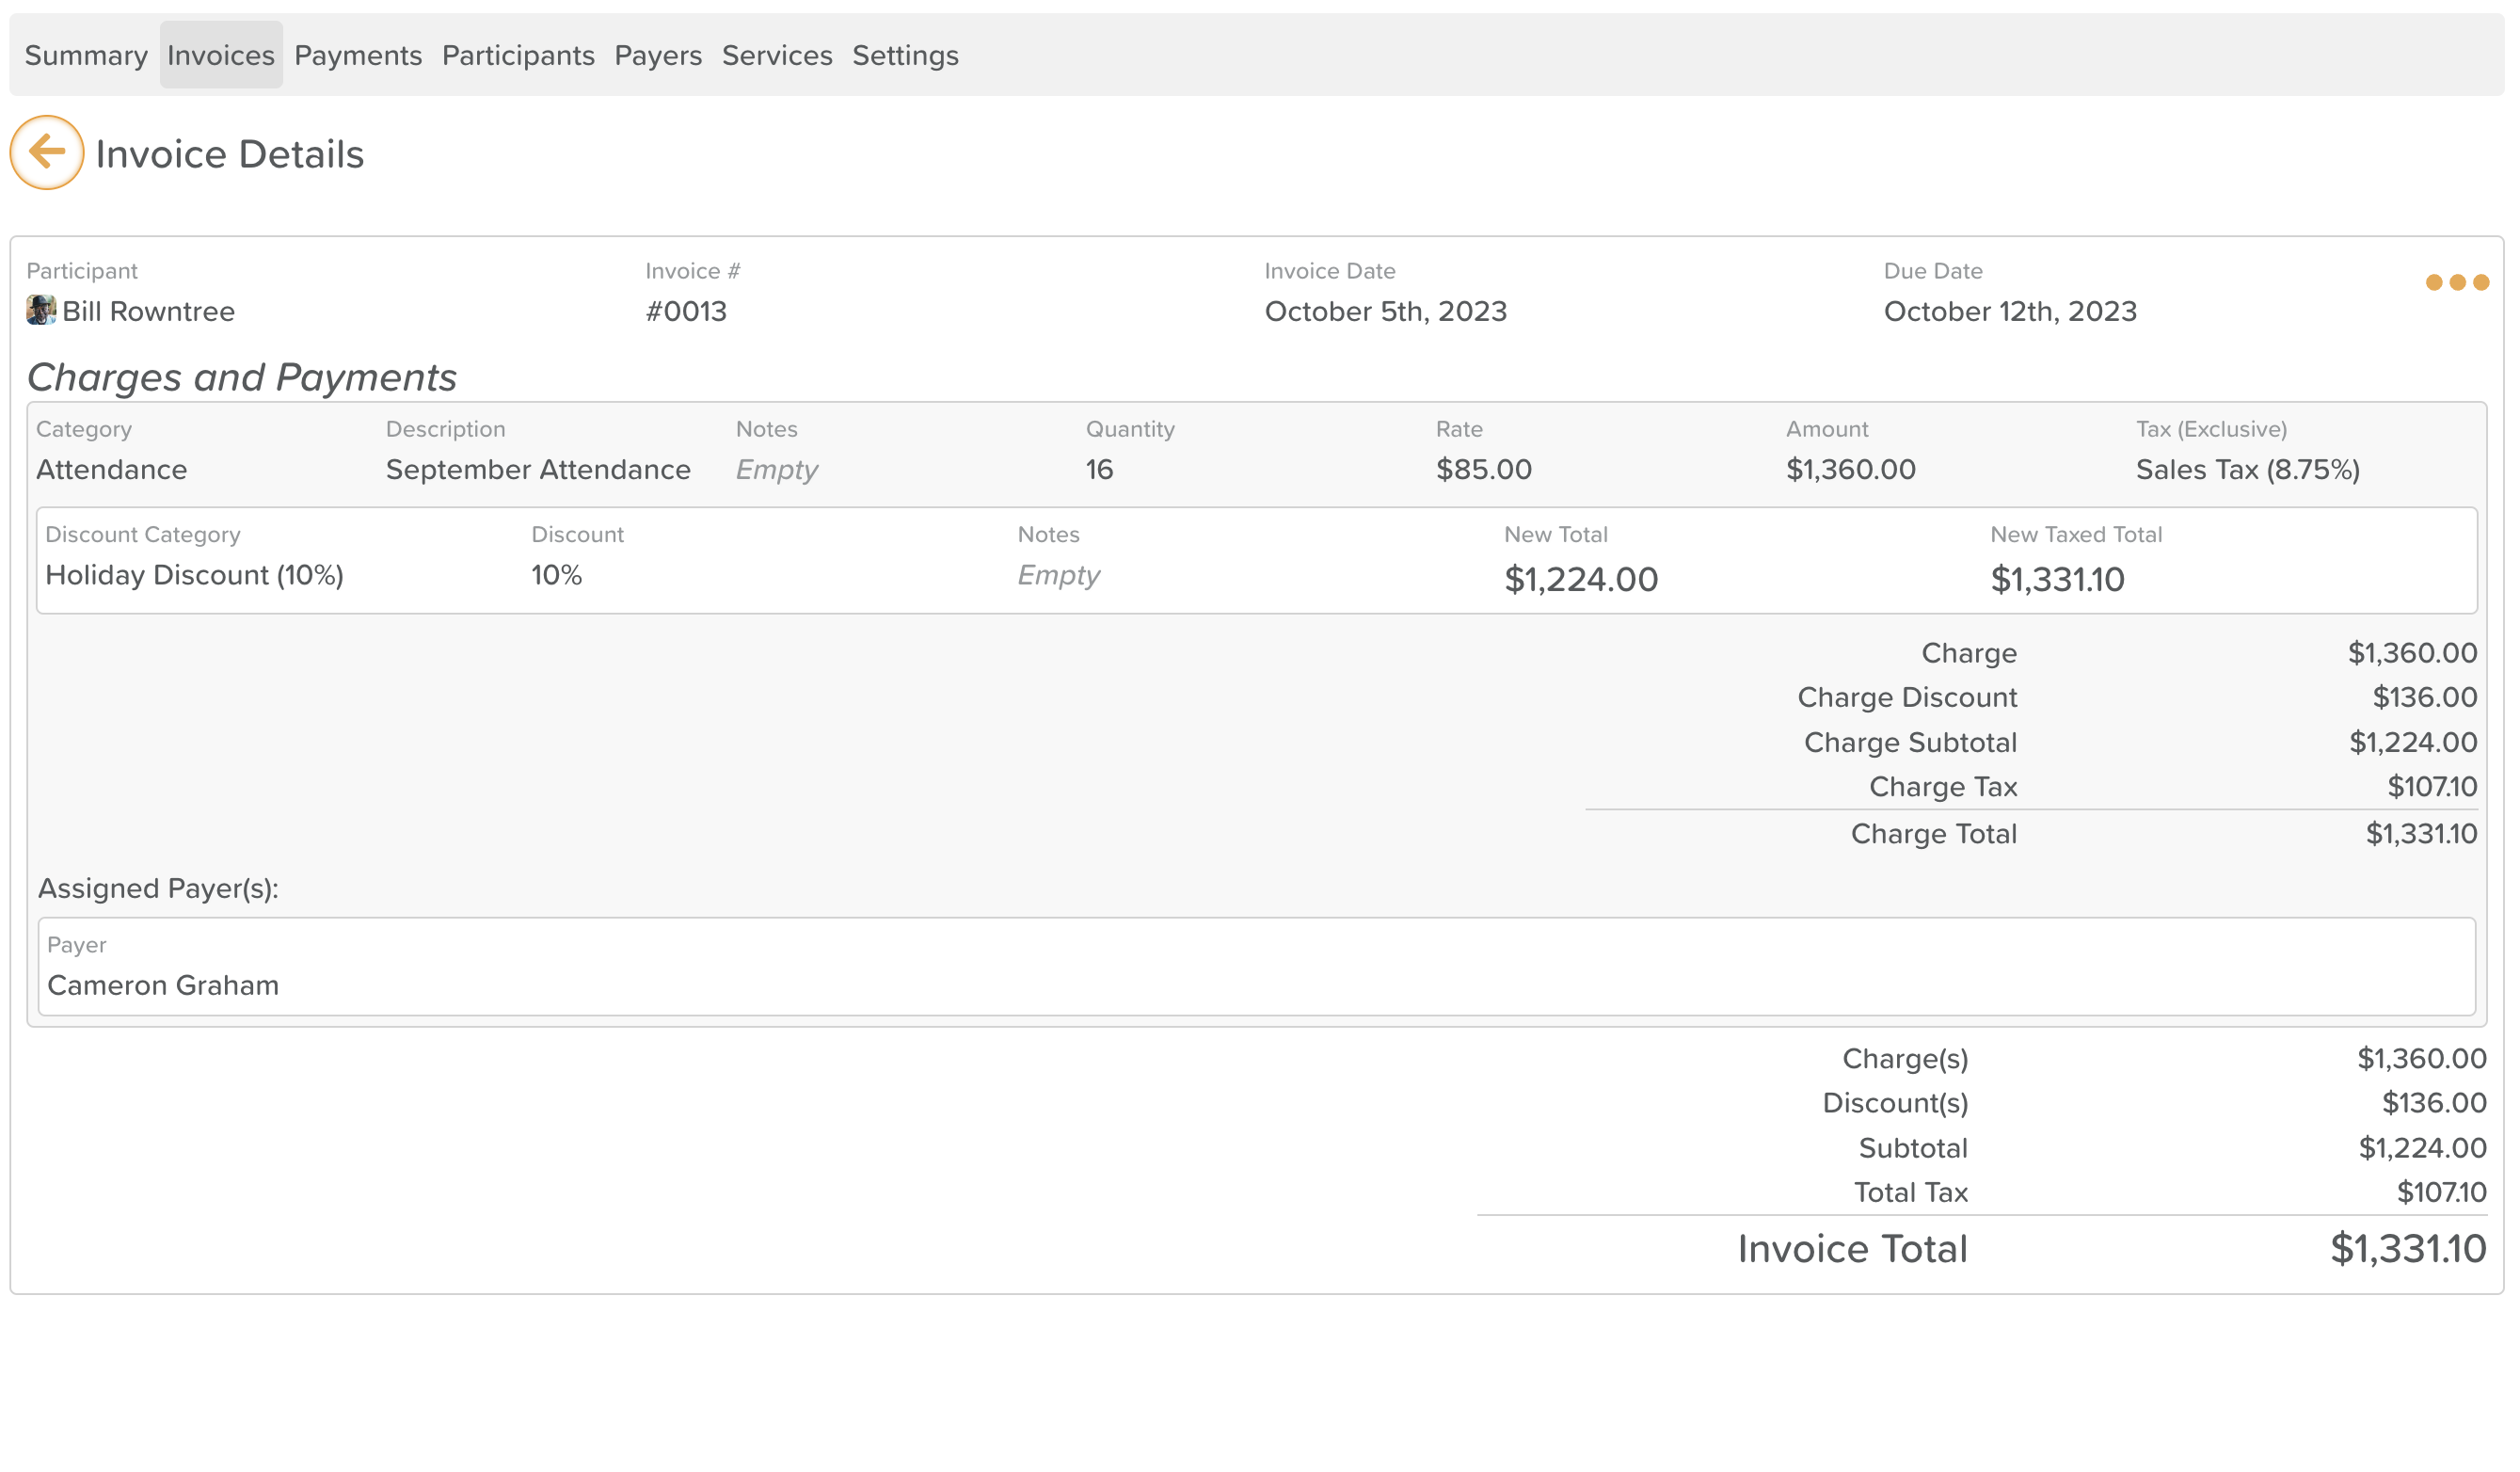
Once saved, your invoice will be available in the invoice view, from which it can be edited, voided, reconciled and exported as a PDF in addition to applying payments to an invoice. To action any of these options, select the ellipsis (three dots) to the right hand side of any invoice.